August is National Golf Month, so I have some really cool DIY tips to share to save time and money with your gear. I'm going to show how I refitted clubs to replace haft, how I came up with some really-cool, custom flame-finished heads, and how I replaced the grip.
Thank you to Bernzomatic for sponsoring this post. The opinion and experience is 100% my own.
Practice Clubs
Before monkeying around with a good set of clubs, I thought I'd pick up a few cheapies to try out my technique. As luck would have it, my local Goodwill store had a one or two to spare.

Join the club.
I picked out an assortment to play with. Breaking the bank, I walked out the door with a handful for less than 5 bucks. I know. Extravagance.
Some of them even came with absolutely free bonus residue from the last rounds they'd played. I knew it was soil and turf from the finest courses in Scotland, so I'd need treat them with reverence.

8...6...7...5...3...0...9...
DIY#1: REPLACING a Golf Club Shaft
Golf club shafts are made from graphite or steel with a variety of flexibility. The speed the head moves determines how much of the flex a player needs to have. The higher the speed, the stiffer the shaft needs to be. The steel shafts are more rigid while the graphite ones are lighter and faster. Changing out the shaft to fit your game is a super easy DIY project.
Removing the Head
It's a simple process to pop the head off the shaft. There's a strong epoxy in there to keep the head from flying off and pinging off the heads of your golfing party*. While it's tough enough for centrifugal force and cracking against golf balls, it's absolutely no match for propane-fueled, high-heat.
* Golf Tip: In the game of golf, denting a companion's cranium with a flying piece of 9 iron is considered "poor form" or "rude".
I used my Bernzomatic TS4000 High Heat Torch to heat up the area where the head slides over the shaft. I slowly spun the head around, evenly heating the neck.

The Bernzomatic TS 4000 High Heat Torch
It didn't take long, maybe a minute or so. There was a slight crackling sound; I could twist the head off with a thickly-gloved hand. A pair of pliers probably would have done the trick as well.

Removing the head from a golf iron
I repeated the process, working my way through my "new" collection of the fine Goodwill irons. It took about 2 minutes each on average to behead them.
Replace the Head
Since I was going to replace the same shaft in my practice run, all that had to be done was to clean the residue off and re-epoxy the heads. Super simple.
In my collection, I had a two styles of connections, inner and outer mounted shafts.

Innie

Outie
Clean it up
I used the 3M Synthetic Steel Wool, to sand all the old residue off the shaft. It also leaves some light scuffing for new epoxy to grab ahold of. A good wipe down of both surfaces with mineral spirits gets it cleaned up to accept the new adhesive.

Steel Wool-ish

Get into the spirits
Glue it back together
Mix up a small batch of epoxy and apply a thin coat to both surfaces. It's a snug fit; if too much gets buttered on there, it will goosh out all over the place. To keep it neat, wrap some masking tape around the edges.

Epoxy Swirling

Using a cotton swab, without the swab
Slide the pieces together, gave them a twist to line the grip up, and peel the tape off before the epoxy can harden. Let the epoxy dry and go crack some golf balls...

...but before you do...
DIY#2: How to Custom Flame Finish a Golf Iron
Before installing a new shaft, how about a cool, customized color finish on the head? I've done a bit of light torch-fire finishing on wood and metal in the past, but this time I wanted to go way past "light" and give a full treatment of high-heat to see what colors I could bring out. First, I'd need to clean them up.
HAVE A SOAK AND A SMILE
The heads I had were rusted, tarnished, dirty, and glopped with price tag residue. I gave them an overnight bubbly-soak in a top-secret, concoction known only to a select few individuals known as "everyone on the planet".
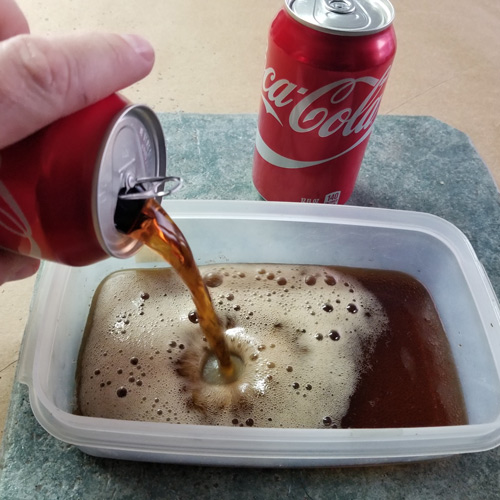
Coke is it!

Bath time

Bubble bubble
The heads came out of the bath with all their gunk and corrosion nicely loosened up. I gave them a quick rinse and a good scrubbing with WD-40 and 3M Synthetic Steel Wool. I started out with the rougher stuff, #2 and finished by polishing with a fine #0. They got nice and shiney.

To get a good flame finish, all the oil residue needs to come off, even fingerprints. I used WD-40 Spray Degreaser and fresh paper towels. I wiped it nice and dry.


Heat it up!
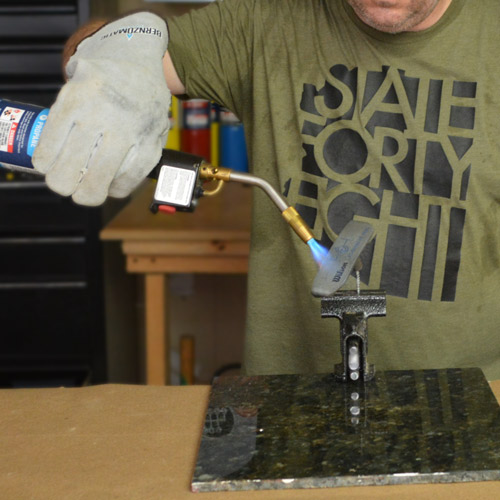
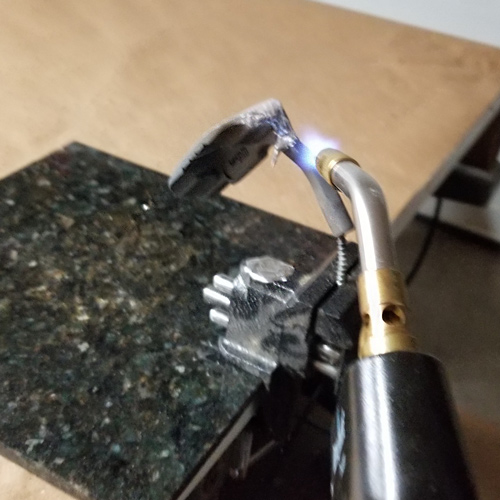
I started my project with a Prima 9 Iron. This club had cleaned up pretty well but it was one of the rougher specimens in my collection, fairly beat up with scratches and nicks. I clamped a screw into a small vice to perch the head on and lit it up with my Bernzomatic TS4000 High Heat Torch again.

Torch heating a 9 iron
It feels like a really long time that nothing happens, but around the 3-4 minute mark I noticed the metal start changing into a warm brownish color. Once I could detect the smallest color change, it rapidly changed to a new tone across the whole iron. That's how the whole project went, colors changed suddenly like the turning of a page in a book. I'm sure it happened as levels of temperature were met.

Lightly Toasted
I kept the torch moving slowly, back and forth, up and down. The color got darker and darker. I flamed the thing for at least 20 minutes, non stop. I really liked the TS4000's "lock-on" button so I didn't have to hold the trigger down all the time.

Like a roasted chestnut
By the time I finished, the club head red-hot. The colors slowly faded as it cooled, I think I'd describe this one as more of oil rubbed bronze look. It was positively radiating heat so I left it alone to cool and headed in for breakfast. I'll show all the finished results at the end of the post.

Heated Cherry Red
Torching More Clubs!
Since it's a pretty fun process and I had a handful of heads to play with, I kept on torching to see what I could accomplish. Next up was the putter.
It was some kind of cast material (aluminum, I think?), not steel like the others. Looking back, with careful consideration, I don't recommend the torch technique on this type.

Nope.
Don't do it.
It kinda turned into a melted solder looking stuff. I'm not going to say it wasn't fun though. On to the next!
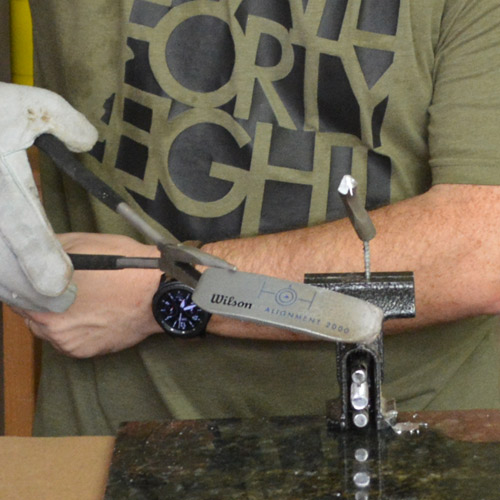
I clamped in a Wilson 6 Iron. This one had a second, short shaft attached to the head and a disk weight thingie. The weight popped off under the heat, but would be no problem to epoxy back on later.

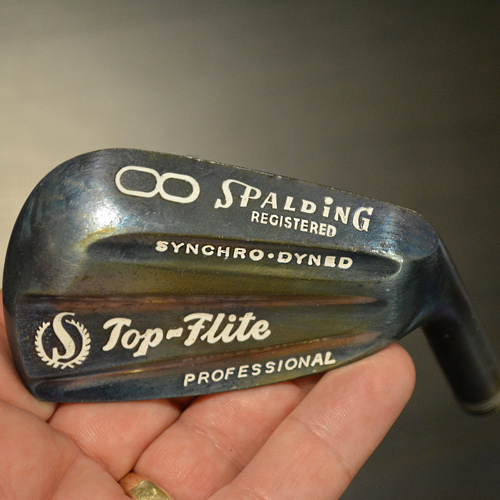
Finally, now that I was practiced up, I tackled the nicest looking head, a gleaming Spalding 8 iron. Originally one of the dirtiest and rustiest of the bunch, it had cleaned up really well.

The 8 Iron before the flame
After a few minutes under a propane-fueled inferno, the metal eased into a golden brown. Streaks of color in the blue and purple ranges started to appear. This one would be the best of the bunch.

When I was done and the head cooled, it retained some of the cool colors. I love the iridescent look, the changes in color as it catches the light. No two of my photographs show it the same way.

The flame finished 8 Iron, cooling.
The Reveal - Flame Finished Golf Irons
Here's my collection of flame-finished irons. They turned out really neat, considering just how beat up they were to start with. I can imagine how cool a smoother, less Goodwill store-ish head would finish up.
The Spalding 2 Iron
I didn't do anything to this one other than take it off the shaft. No magical Coke soak, no flame. It's tarnished and cruddy. This is your "before" photo. It's from the same set as the 8-iron I torched.


The Wilson Putter
Yeah,... well... as fun as it was, in a kid-with-matches kind of way, let's just forget about this little detour. Don't mess with these lightweight, alloy numbers; stick with steel.

"All the king's horses and all the king's men...

... could not put putter together again."
The rest turned our really cool. I colored the recessed areas with crayons and wiped the excess off to show the beauty of what can be achieved. I don't think crayon will hold up under real playing conditions, so I'd use paint on my future projects. They turned out great!
The Wilson 6 Iron
This Wilson was more beat up than the others. It darkened up evenly, with hints of blue and brown, but it's a fairly constant tone. I'd call it a "weathered steel" look.


The Prima 9 Iron
I love how this one turned out. It's a even-toned, bronzy look, warm and expensive looking.


The Spalding 8 Iron
This is my favorite of the bunch. It has an overall gunmetal-gray tone, with hints of browns, blues, and purples as it catches the light. It also has the most engraved detail that shows a nice contrast when painted.

DIY#3: Re-Gripping a Golf Club
After a while grips wear out and your game starts to suffer. Why pay a pro shop to do something you can do yourself in just a couple minutes? It's super easy.
Out with the old
Clamp the shaft in a vice - It needs to be held pretty securely, yet protected from damage due to the steely jaws of the vice. They make cool, specially-designed widgets to do the trick, but I didn't pick one up for my practice project. I used a custom-crafted layer of cardboard.
Cut the grip off - Cut away from yourself, unless you want to join me in the Order of the Purple Hammer and taking a quick detour to the urgent care in the middle of your fun weekend project. Take care to not damage the shaft with the blade. Hooked blades are good for this. It still takes some tugging and picking to get the grip free.

Strip the grip!
These grips are held on tight with a double-face tape. It would take forever to pick off, bit-by-bit, but the power of fire gets the job done quickly. I roasted it, very briefly, with the TS-4000 to break down the glue.

The Bernzomatic TS-400 removing tape
I give it a light scrape with the same little multi-tool I'd used when scraping crusty, old painted hinges clean a while back using a similar torch method. All the adhesive tape came off easily. A quick toot of WD-40 and a paper towel cleaned the shaft to a beautiful, like-new shine.


On with the new
I found up some specialty, two-sided grip tape at a sporting goods store. I wrapped it carefully around the shaft, letting it hang just past the end. The excess got twisted the and tucked into the open end of the shaft.
The tape I used is solvent activated, so it's a neat trick to get the new grip on. First you pour a solvent, like mineral spirits liberally over tape, then into the grip with your thumb over the little hole in the end. Swirl it around thoroughly and let it drizzle out, like melted butter, over the grip tape.

Apply Tape

Solved with solvent

Don't forget to plug the hole!

Season to taste
In a quick push, slip the new grip over the wet tape and spin it around to line up properly with the head. It needs to sit overnight to cure and prevent the inadvertent slingshotting of the iron out of the grip on the first hard swing. (Remember my tip about flying golf clubs.)

Get a grip
You know I'm a huge proponent of Do it Yourself projects. These three projects were a ton of fun and super easy to do. I got to try several new techniques without spending much money at all. Just think of how much money you can save doing all three of these DIY's with a Bernzomatic blow torch and some simple tools.
How about those flame-finished club heads?!!