Learn how to make a DIY Mandala Tray using wood burning with a heat-sensitive pen and blowtorch. This is a quick project and only takes a couple of hours.
Directions
Step 1 – Prep the tray
No matter what you choose to make, surface prep is extremely important. Sand the surface with a fine sanding sponge in the direction of the grain and wipe away all the dust. You can use a tack cloth to make sure to get all of the dust particles.
Step 2 – Stencil
Decide on the positions of the patterns and lay the stencil on the tray. Attach the stencil to the tray using masking tape to keep it from moving. Using the heat-sensitive marker, fill in the stencil.

Depending on the color of the marker, the markings can be hard to see. Starting at one end and keeping track of the pattern helps. This design calls for a pattern in the center and two on opposite corners.
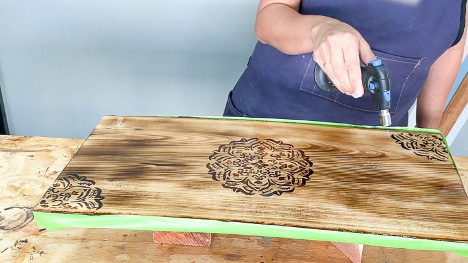
Step 3 – Burn!
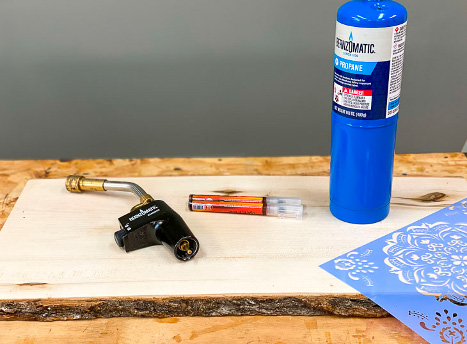
Lay the plank/wood tray on a few pieces of scrap wood elevated over a concrete or stone floor. Using a Bernzomatic BZ4500HS and propane, slowly torch from one end to the other.
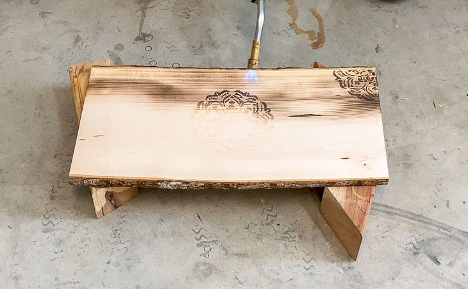
If you are using a wood plank like me, also torched the back of the plank and a couple of 6″ pieces of 1×2. Attach the 1×2 to the backside using a brad nailer and finish nails.
Step 4 – Add the epoxy
Mix up the epoxy using directions on the package and pour it on top of the patterned side. You can use painter’s tape on the edges to keep the epoxy from flowing to the edges.
Step 5 – Pop the bubbles
Use a Bernzomatic ST2200 Detail Torch loaded with butane to pop all the bubbles in the epoxy. Allow it to cure for the recommended amount of time.