Learn how to make a simply DIY Upholstered metal bench using aluminum brazing. This easy technique and simple project is perfect for beginners, so they can incorporate metal into their projects without welding!
Watch the video for a full tutorial and to see the Bernzomatic torch and brazing in action.
Directions
Step 1: Cut Aluminum to size
Cut the Aluminum tubes to required lengths on a saw. You can find the full cut list below:
- (4) 1′′ x 1′′ Aluminum square tube cut @ 17′′ (legs)
- (4) 1′′ x 1′′ Aluminum square tube cut @ 22′′ (long aprons)
- (2) 1′′ x 1′′ Aluminum square tube cut @ 12′′ (short aprons)
Aluminum is a very soft metal and it can be easily cut using woodworking blades and saws. Use a miter saw to cut it.
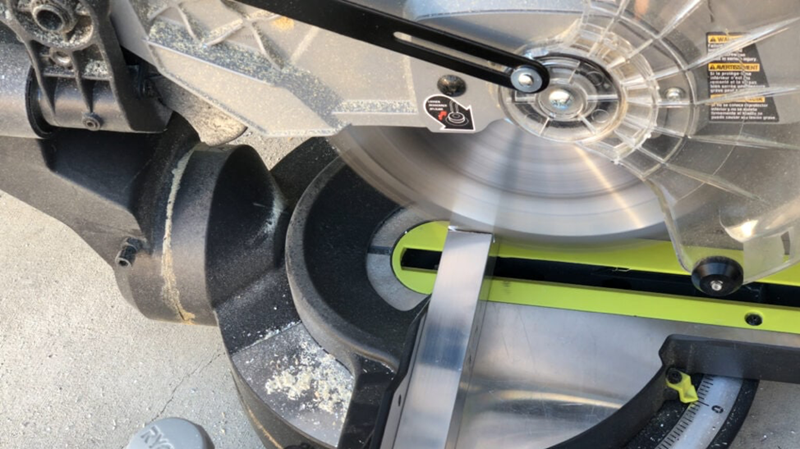
Tip - be sure to cut really slow through the metal
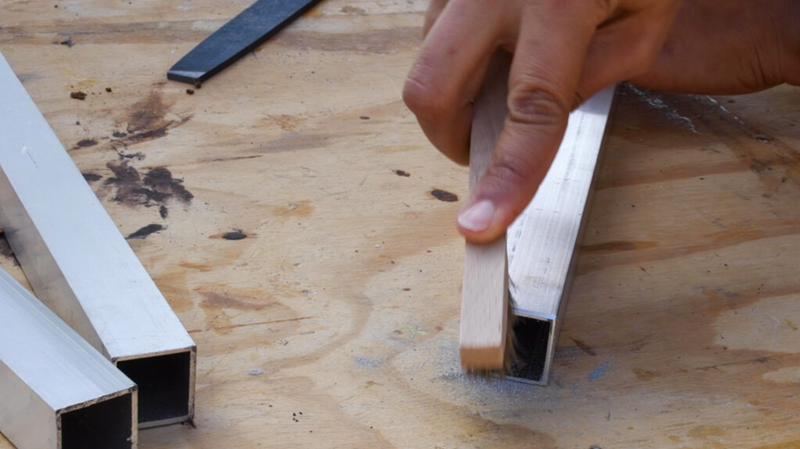
Step 2: Prepare the aluminum tubes
- Clean all the tubes using acetone to remove any residue, gunk or oils.
- Using a metal file, create a "channel" on the edge of the end that will get joined. This is where the brazing material will sit. Be sure to do this on all sides of the tube.
- Use a wire brush to remove all particles and clean it.

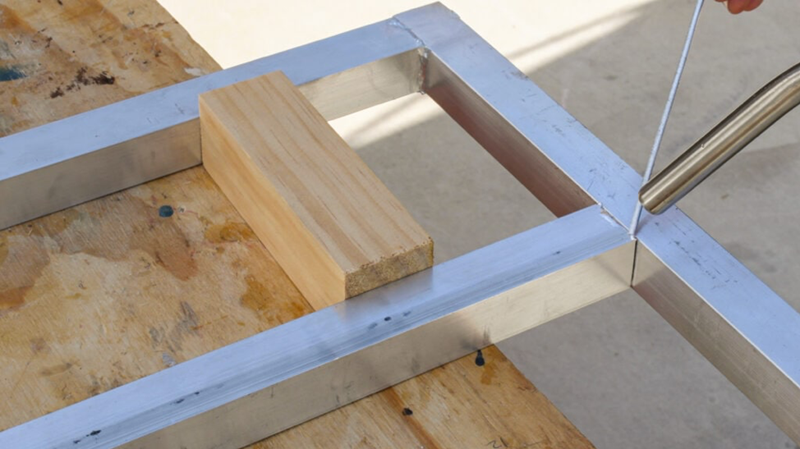
Step 3: Set up joint
Using a speed square, set up the metal pieces you want to join and hold them together using a metal clamp.
Be sure to use a speed square to keep everything square.
It is key to use a metal clamp for this project as the aluminum tubes get really hot and the clamp comes in contact with the flame. Plastic will just not survive.
Step 4: Braze!
Use the Bernzomatic BZ8250 Hose Torch for Accessibility and Mobility hooked to a Bernzomatic MAP-PRO fuel cylinder to heat up the joint.
For a new joint, it takes about 3-5 minutes to get the aluminum hot enough to melt the brazing rod.
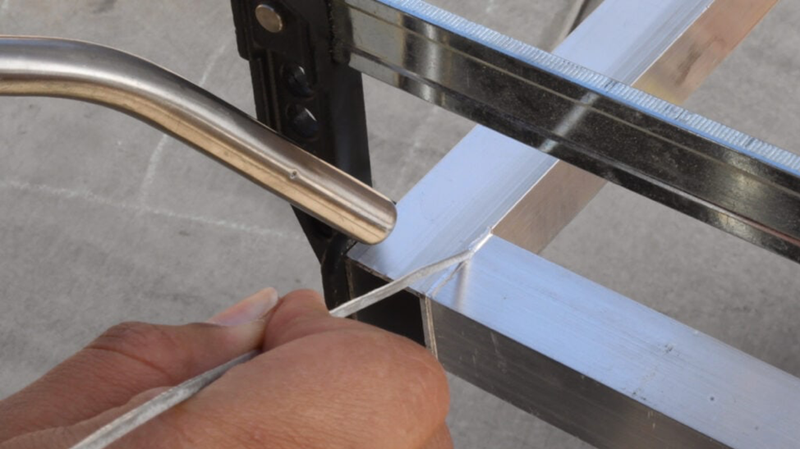
Very important - The aluminum tubes should get hot enough to melt the brazing rod on contact. The brazing rods should NOT be melted directly using the heat from the torch. This will not make a strong joint.
Once you get one side brazed, you can continue to braze the other 3 sides of that joint. This is slightly faster because the aluminum tubes are already slightly hot.
To attach the second tube on the sides, use 2x2 blocks cut to 5".
Remember - The tubes as well as the clamp can get really hot. Even if you’re wearing heat resistant gloves, wait a little while before touching it to move.
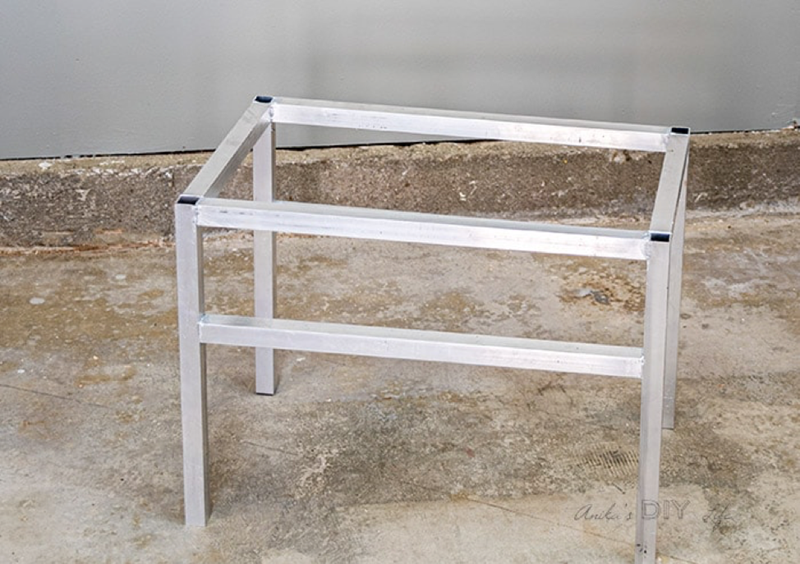
Step 5: Clean and paint
- You can file away some extra brazing compound if needed but be careful not to do too much of the joints might break.
- Wipe down once again with acetone to remove any residue and dust.
- Spray paint the little bench frame in the color of your choice.
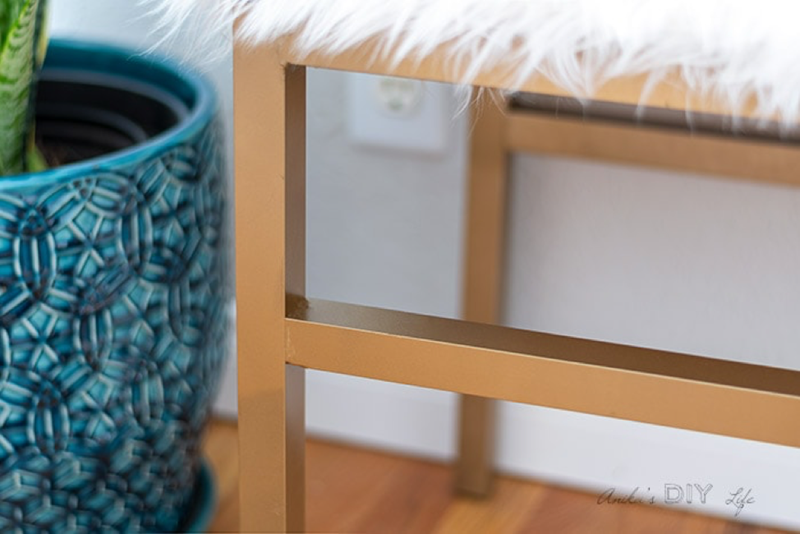
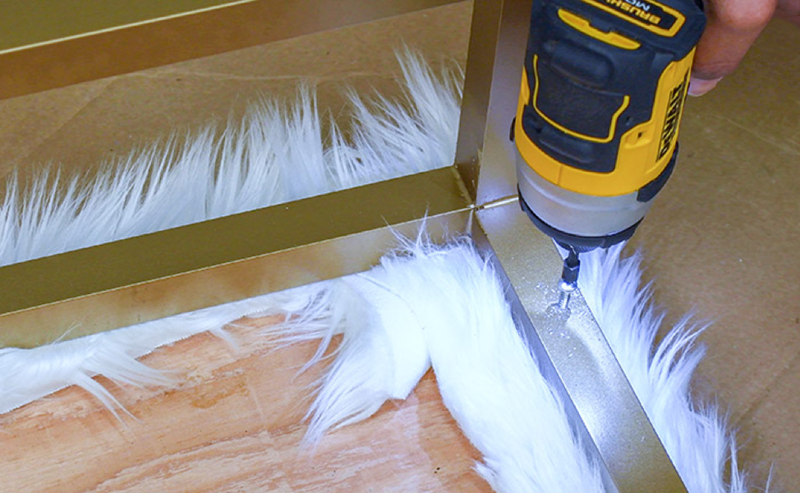
Step 6: Attach top
- Cut plywood to the size of the bench and upholster it using foam, batting and fabric of your choice.
- Feel free to add fur to go for the simple yet glamorous look.
- Attach the upholstered top to the metal bench using 1-1/2" self-taping screws from the in-side.