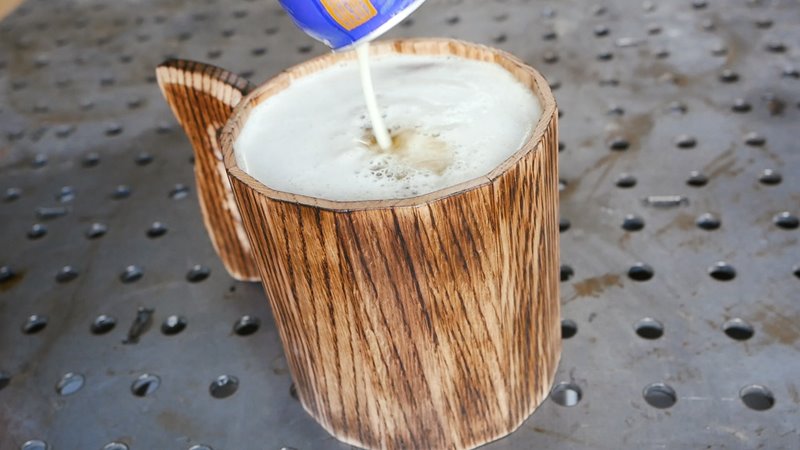
Whether it’s part of your culture or simply an enjoyment of another culture, Oktoberfest is a fun time when people can come out and celebrate with food, dance and of course beer. And what celebration would it be without your own personal DIY Oktoberfest Beer Stein.
Directions
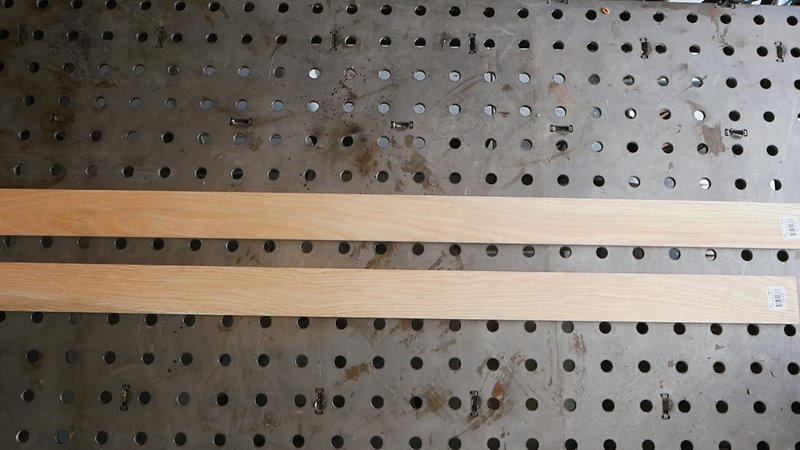
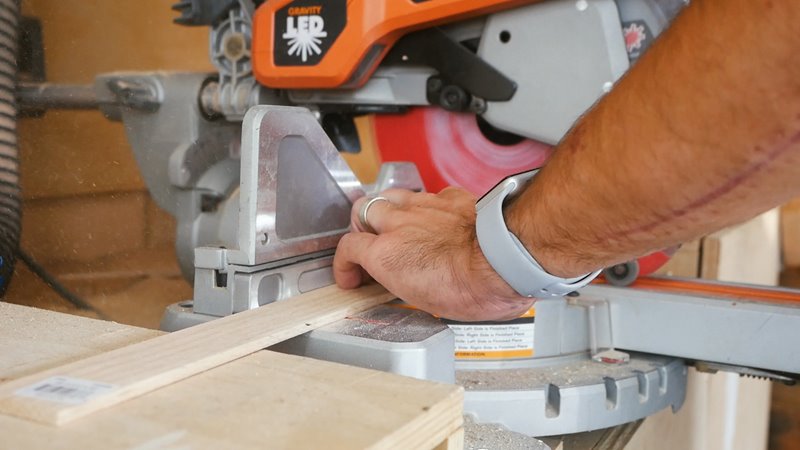
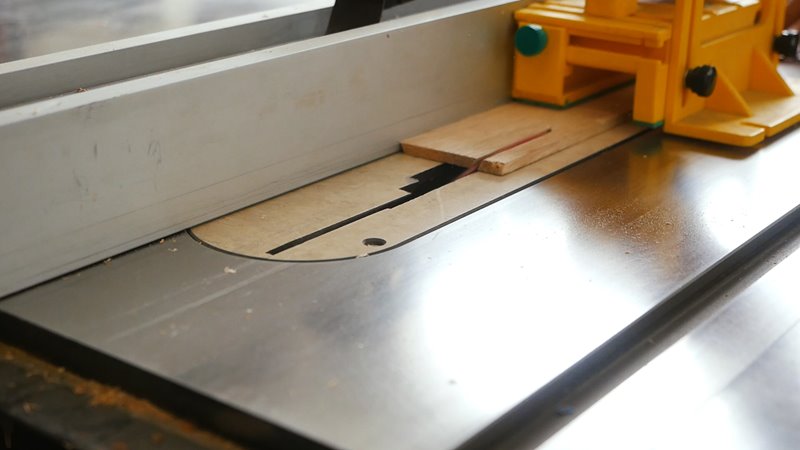
Cut
Cut all oak pieces down to 1.5″ x 5″ long strips.
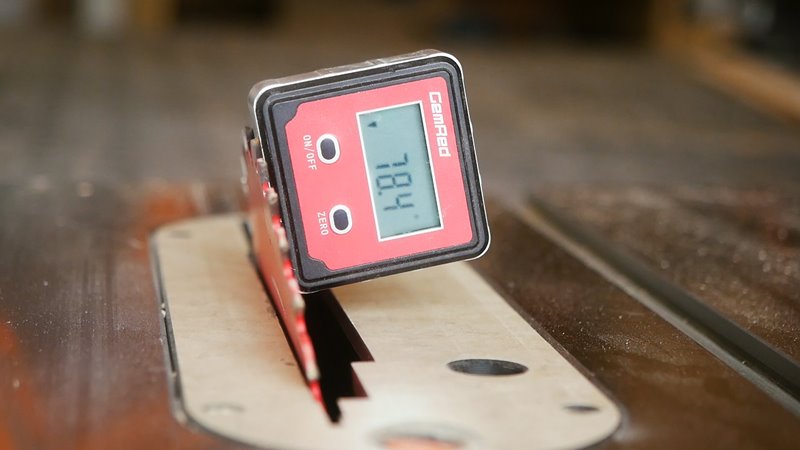
Miter
Tilt the blade on your table saw to 78 degrees. Make a pass on the same face but both edges, creating a tapered wedge piece. this will allow for us to make a radius when all the pieces come together.
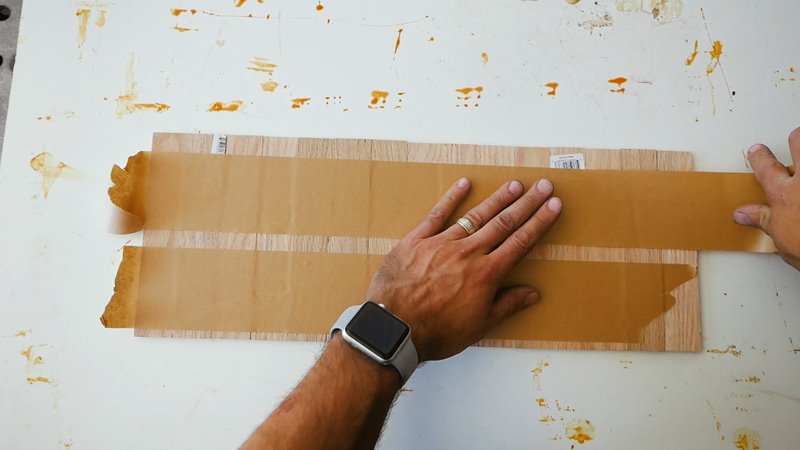
Layout
Lay all the pieces with the inside of the angles faces down. This will be the inside of our Oktoberfest Beer Stein. Then lay down a few rows of tape, this will be the outside. By laying down tape, we are making the pieces to act as a rug for you to roll up and stay in place.
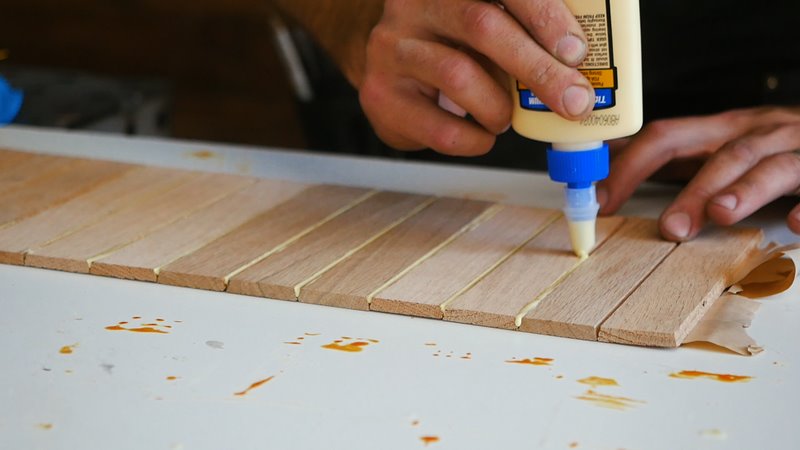
Glue
Flip over to the inside part of what will be our beer stein (Tape facing down). Then, using a water-resistant glue like Titebond II or III, fill all the insides of the wedge looking joints. be sure to cover the entire joint.
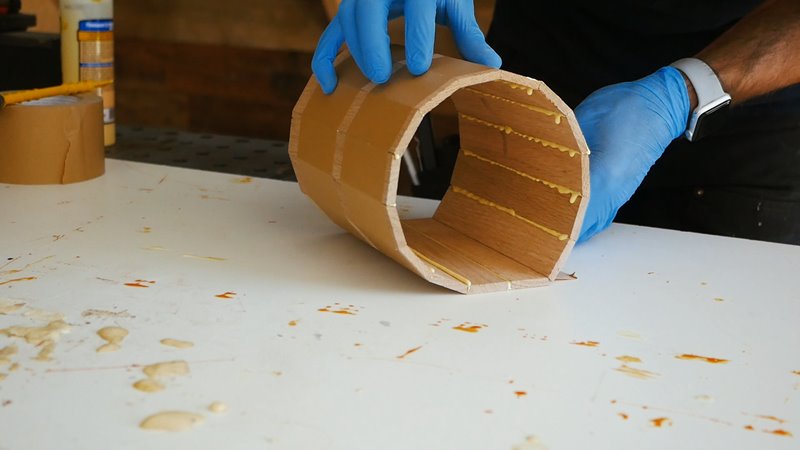
Adding glue to the beginning and the end of the “Wooden Rug”, roll the pieces, connecting both ends together.
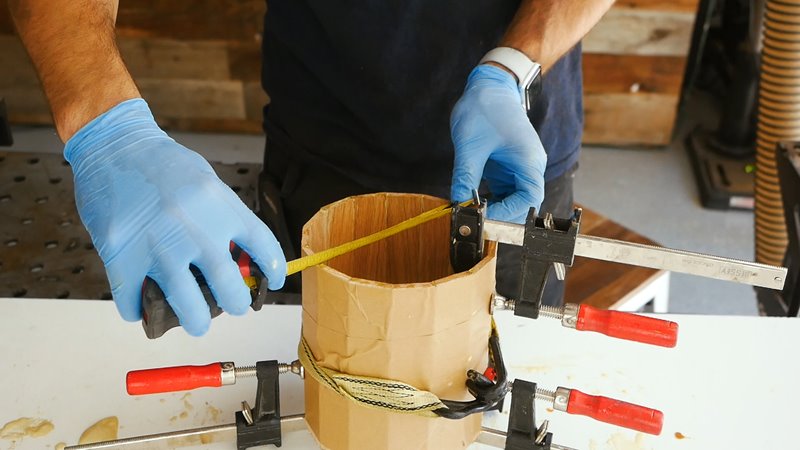
Clamp
Tape up the two ends to keep them from moving, and then use a ratchet strap to apply gentle pressure. Keep in mind, too much pressure will squeeze out all the glue and risk the chances of breaking the 1/4″ mitered joints. Over-tightening the ratchet strap will also cause the beer stein to be more oval shaped instead of circular, so when it comes to clamping pressure, find a good happy medium.
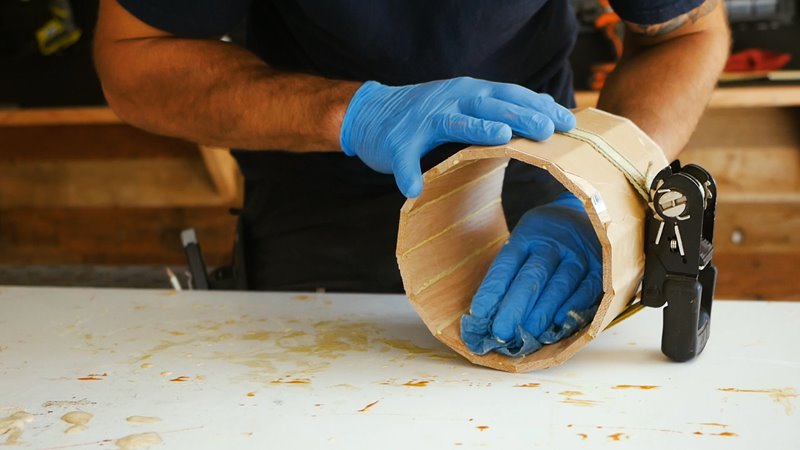
Wipe
To make your life easier, after the glue starts to settle in 20 min, use a damp rag to wipe off any glue that squeezed out from the inside of the beer stein.
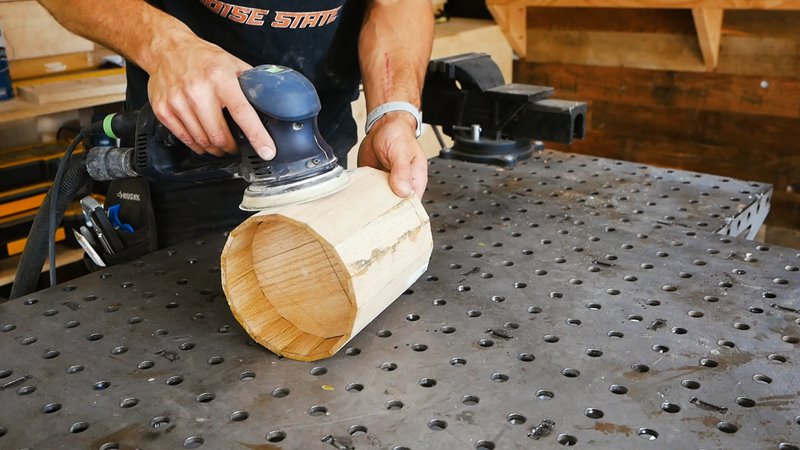
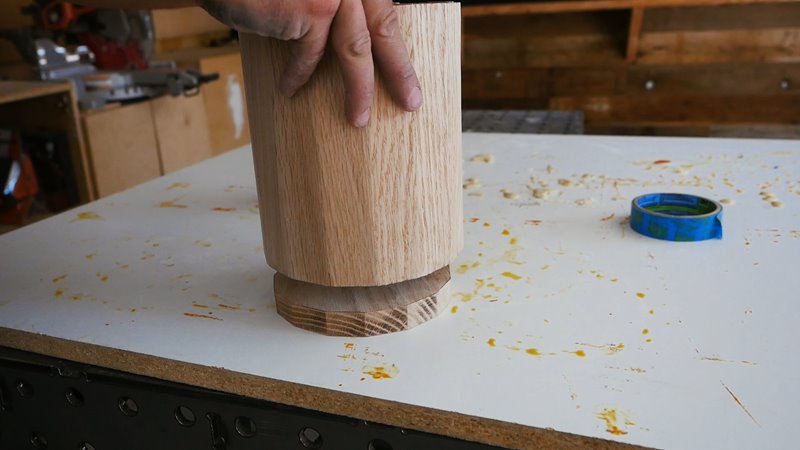
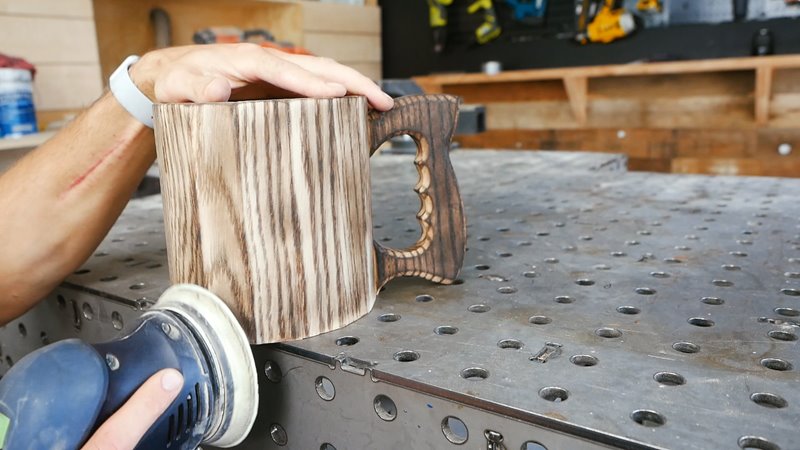
Sand
After the glue dries overnight, remove all the tape and use 80/120/220 grit sandpaper and your random orbital sander to remove any dry glue on the outer part of the beer stein as well as round over each joint.
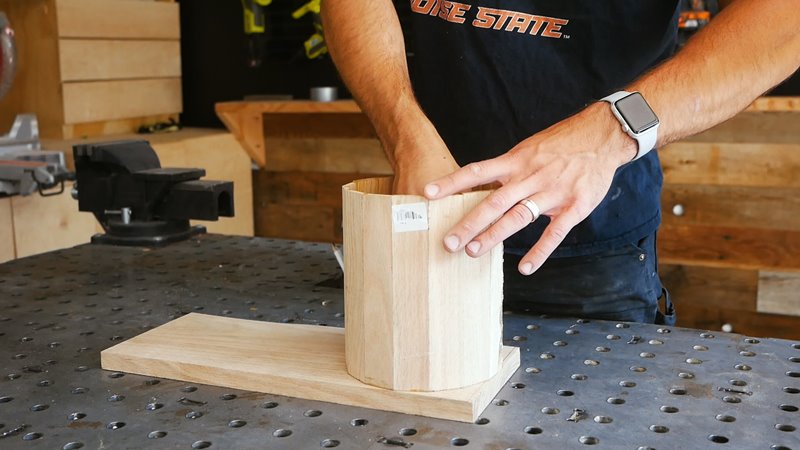
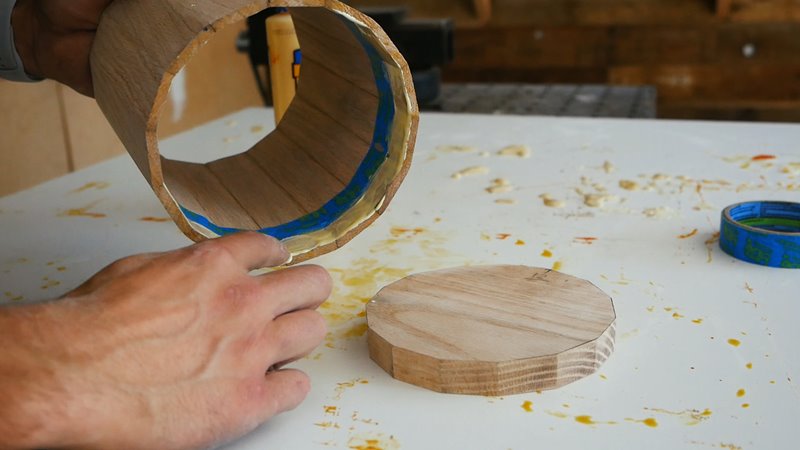
Bottom
Using the scrap piece of 3/4″ Red Oak, place the cylinder shape beer stein over the 3/4″ oak and trace the bottom of the cylinder. This will give us the perfect fit for the bottom.
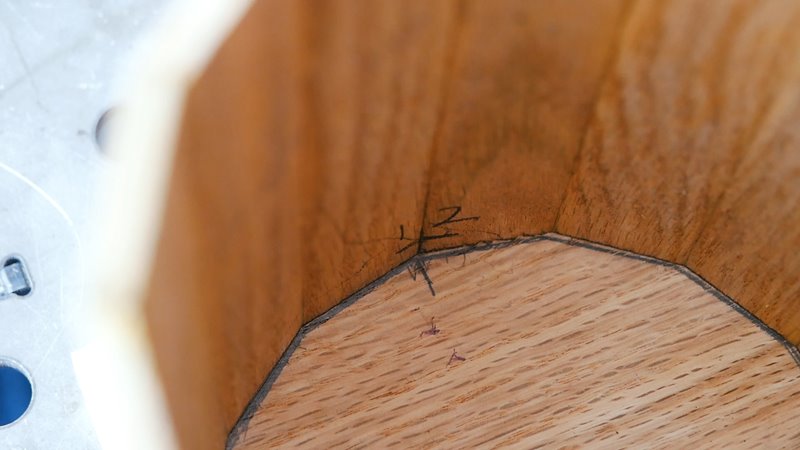
Then cut it precisely on the band saw.

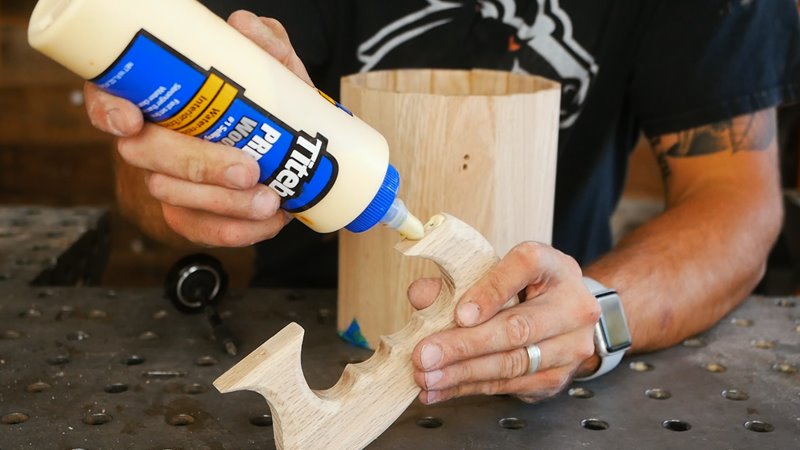
When gluing the bottom, place painter’s tape to prevent glue squeeze-out on the freshly sanded inside part of the cylinder.
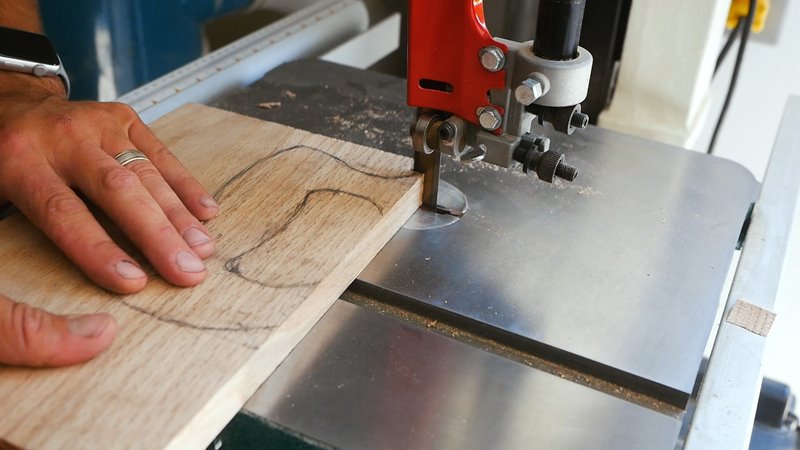
Handle
Using the scrap piece of 3/4″ oak, get creative and draw out a handle for the beer stein. This is the fun part so let your imagination run wild. As long as your hand fits in the handle, there’s no wrong design.
Cut the handle out on your band saw.
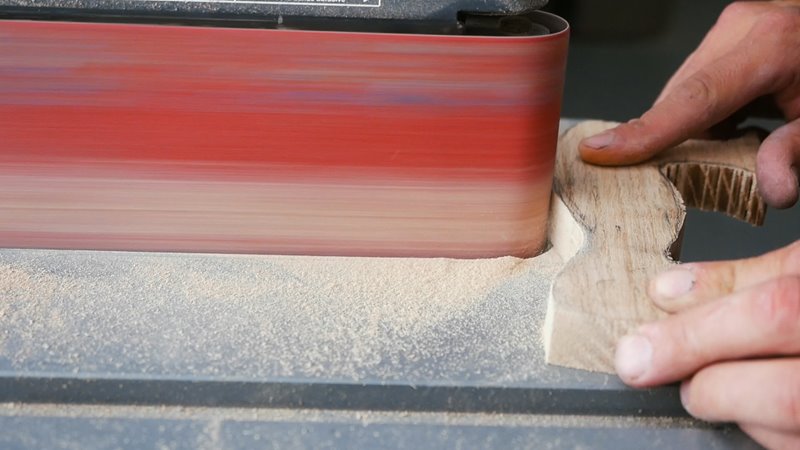
Sand smooth each radius using the belt/spindle sander.
Pre-drill the holes on both the Cylinder and the handle.
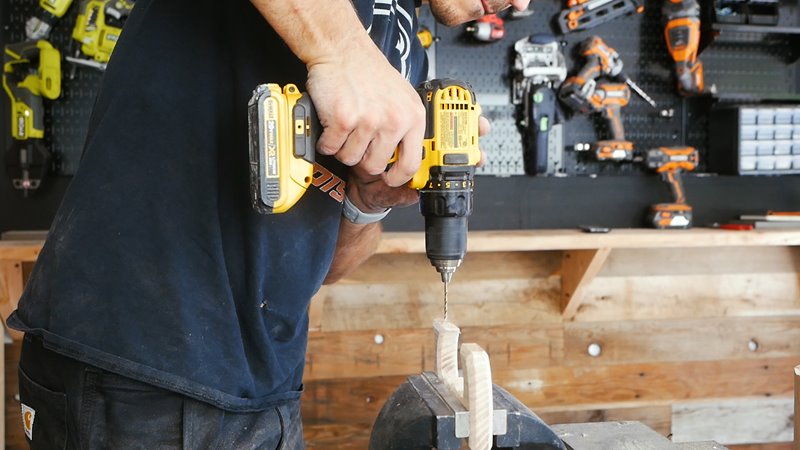
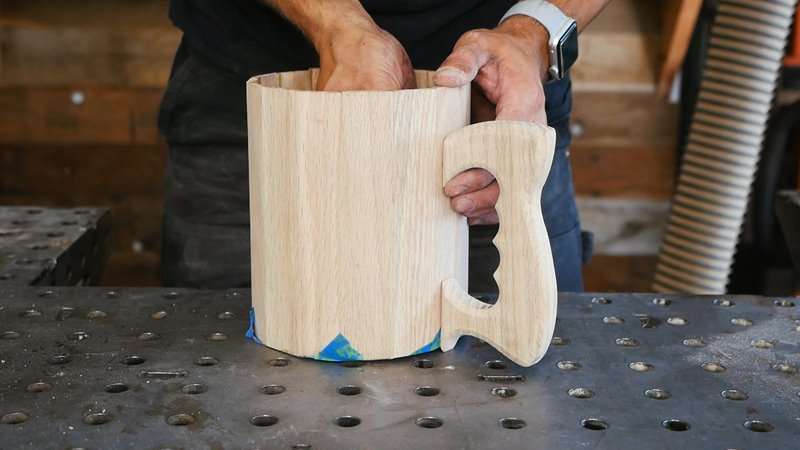
Use Wood glue and 1/2″ screws to secure the handle to the beer stein cylinder.
Trim
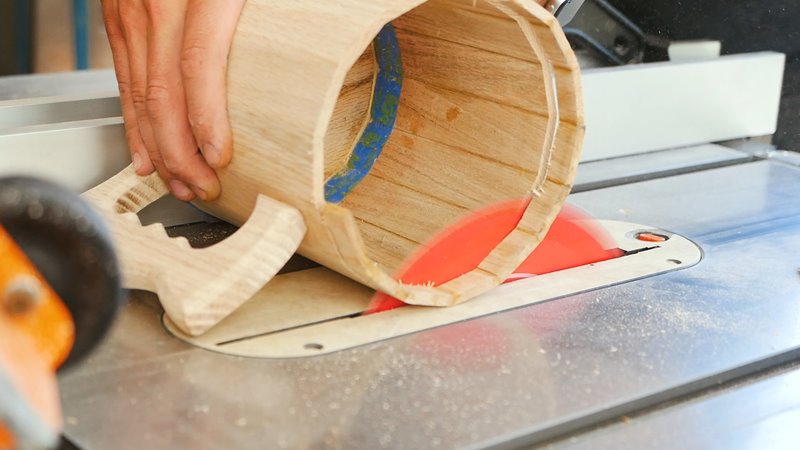
Trim the final height of your beer stein on the table saw or band saw. This will ensure final desired height, along with a flush top.
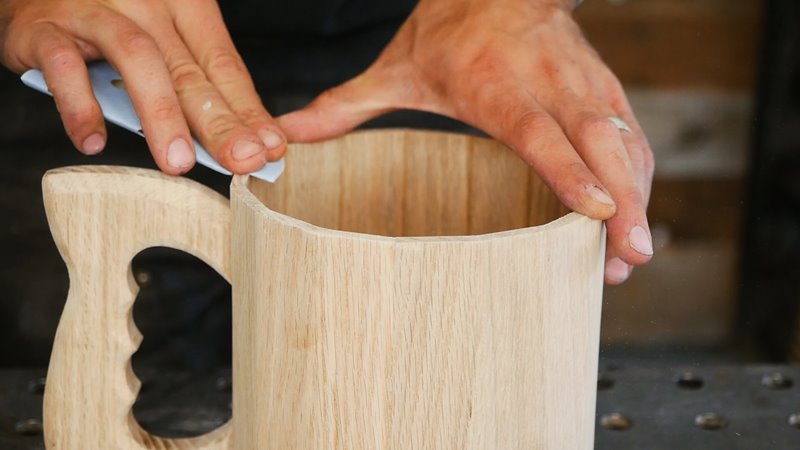
Sand Again
Sand the entire project up to 150 grit.
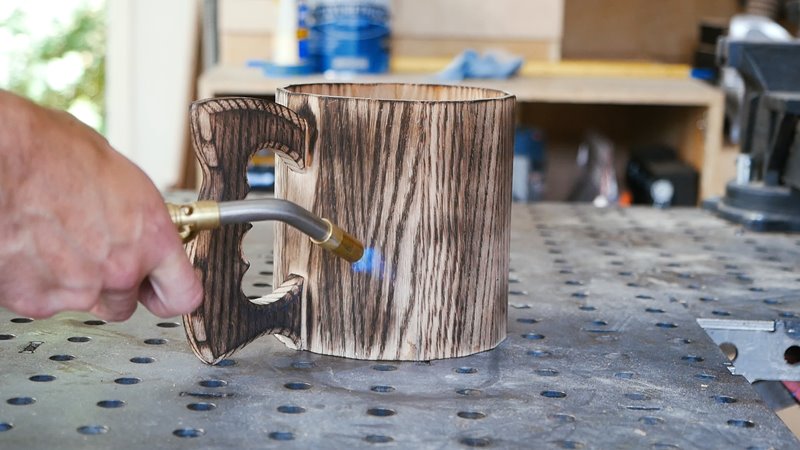
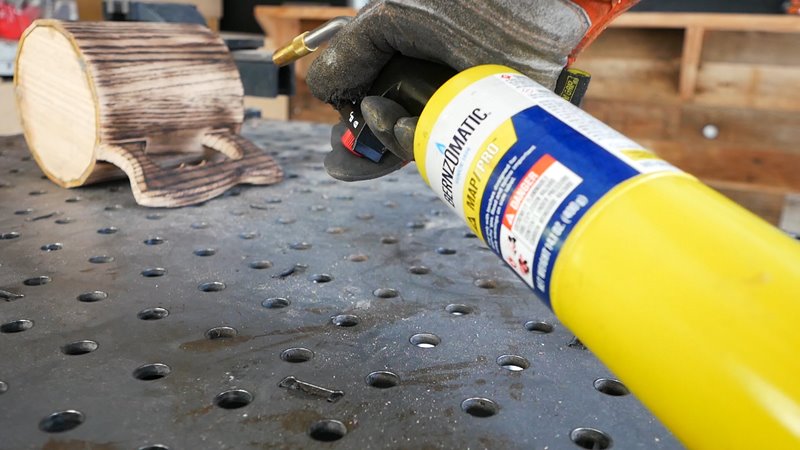
Burn
Using MAP PRO gas and TS4000 Torch, lightly burn the desired finish on the oak. Keep in mind, the wood is only 1/4″ so if it’s hot, it can crack or even unglue, so using a hot torch like MAP Pro and doing quicker passes. I found it helpful doing a few short passes and then holding it up to a fan to cool down, really helped with the ungluing or cracking.
Blend
Using 150 grit sandpaper, sand the burn marks to blend any blotchy inconsistent burn marks.
Finish
Because we will be holding liquid in this Stein, according to an article in Popular Woodworking Magazine by Bob Flexner, almost all finishes are food safe after they cure for 30 days at room temperature. So as long as you let this stein rest, you will be fine drinking out of it. I applied 7 coats of water-based polyurethane with an HVLP sprayer.

I hope you found this tutorial helpful. Be sure to check out the video for an additional detail or technique. Big thanks to Bernzomatic for partnering with us on this project.