When I set out to make a clock, it also appears I set out to make every woodworking mistake imaginable. Come along on my journey of minor calamity and you too could have a clock of your own. I’ll edit out the mistakes.

Make a clock, I said. It’ll be easy, I said.
Quick Note: We are Bernzomatic Torchbearers (I love working with Bernzomatic) and we partnered with them on this project. As you can see from the comedy of errors forthcoming, the DIY and how-to are all mine.
I was lucky when it came to my inspo for making this heirloom timepiece: My friend asked me to find him a clock for his pool house on Pinterest. I thought, you know what, I’ll make him one. Because that’s the same as looking for one.This is me before the wheels slowly, ever so slowly, started coming off the wagon.
However, inspiration like that isn’t always there so you need to gin it up. And a great place to do that—or find bizarre, old, odd, cool material—Garage Sales. What, Clement? Are you crazy?
I am crazy, because I’m writing about myself in the third person like I’m not sitting alone at my desk writing about how to make a clock. But that doesn’t change that it is National Garage Sale Day this month (yes, it’s a thing) and whether you want to whip up a clock of your own or get juiced to make something else with found items, garage sales are great places to find stuff you can finish with fire. More later.
OK, here comes the how-to for this bad boy.
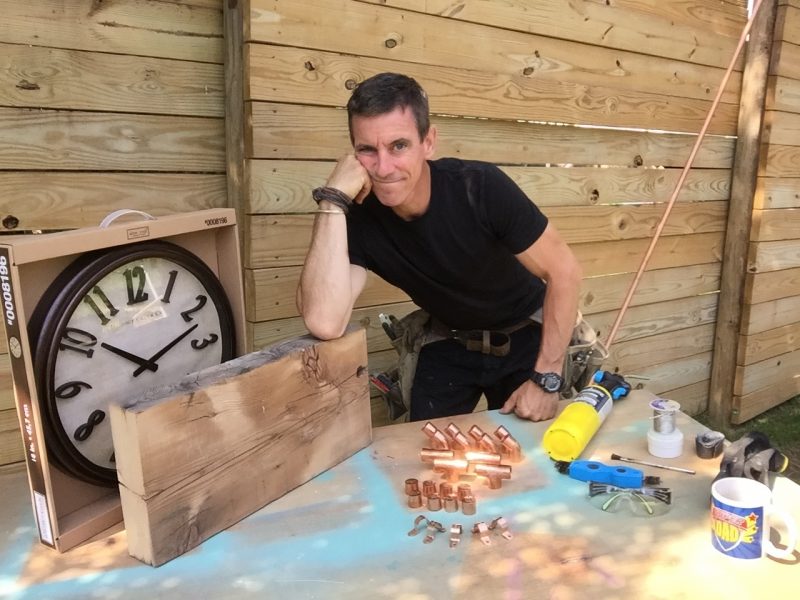
While I’ve heard of dudes uncovering treasure troves of wood at garage sales, I got mine at Philadelphia Salvage. It’s a 3×10 of great awesomeness which I cut square, leaving the aged edges.Start with a ‘blank’. This one is a 100-year old-ish 3×10.
RE: Garage sales, it’s not just wood you can uncover. For finds you can finish—or fix—with fire it doesn’t have to be a maze-run woodworking vision quest.
Save about a million dollars removing rust with a torch, for example, on otherwise perfectly fine patio furniture and re-bling it with color using a couple cans O’ Krylon. Keep an eye peeled for wood storage boxes—I love old wood boxes held together with box joints. And whether it’s a garage sale or a dumpster dive, doors and hardware can be a super get with the paint removeable from the hardware with a Bernzomatic fire maker.
Back to me making mistakes.
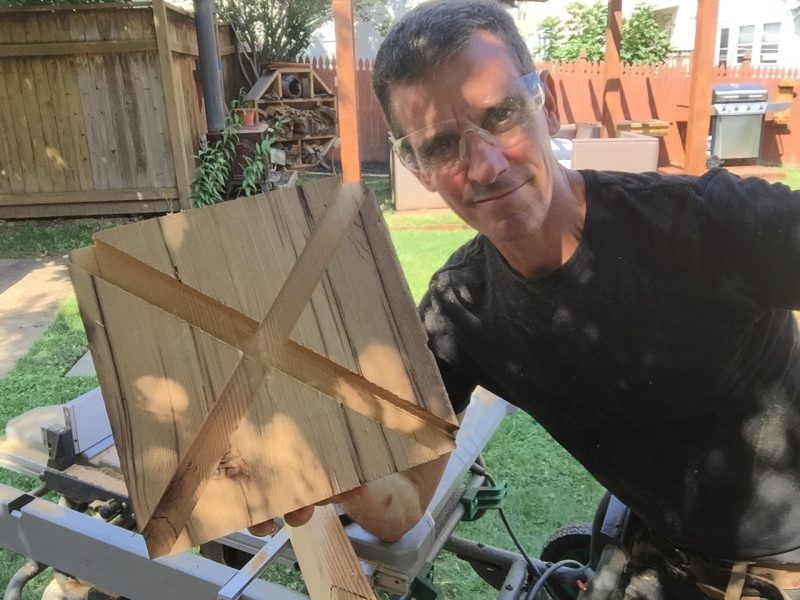
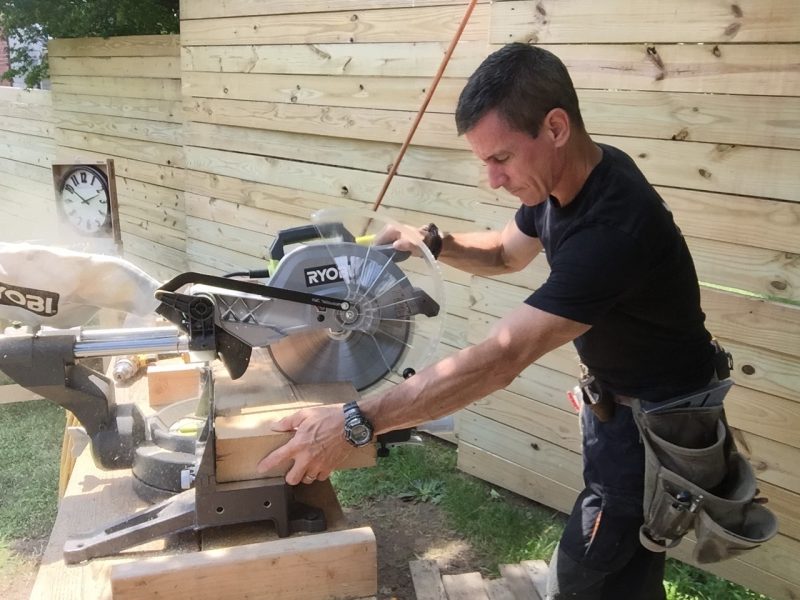
I had to get a little more ‘woodworker-y’ than I typically do with this one. Clearly, I’m no Norm Abram. However, there was just too much going on with my design to avoid it. Two diagonal dadoes on the back of the clock body let the pipe I’ll solder later into the wood. This also means they won’t touch the cedar siding on the pool house, which is also good.Had to go mac Daddy on this. I cut the dadoes for the soldered pipe fretwork with my stacked dado blade.
I used my saw’s included miter gauge and a sacrificial (meaning it’s meant to be cut through) to support the clock body at a 45-degree angle to the blade.I should make a cross-cut sled. I never do, but I should.
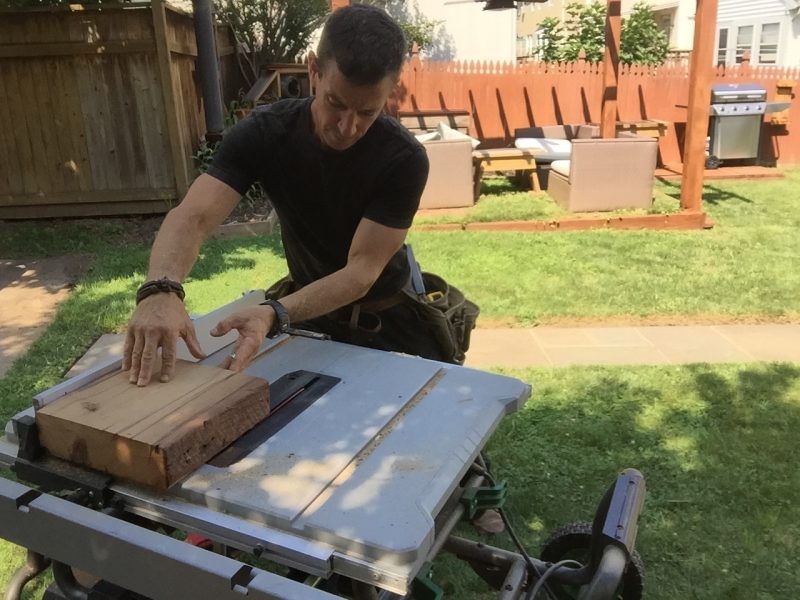
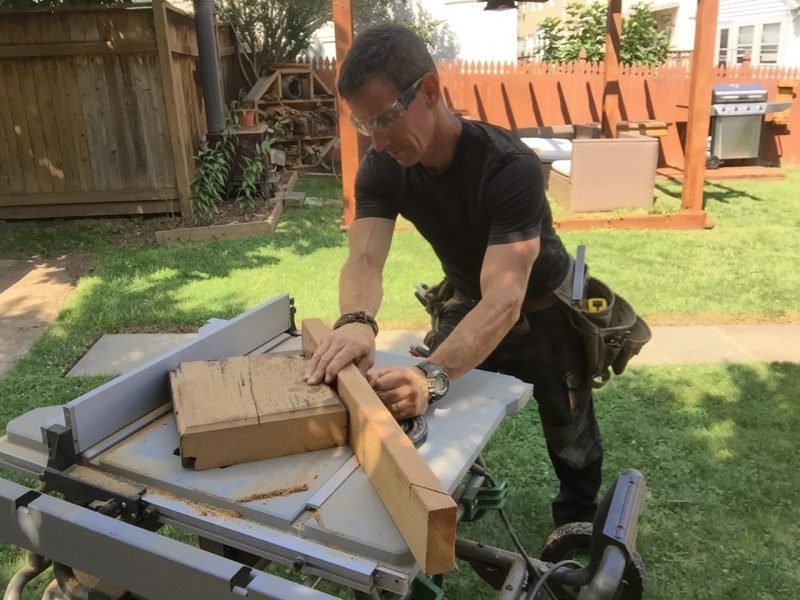
I like edges that have some tooling, so I beveled the ole table saw to 45 and knocked off the corners.Ease the edges on the table saw.
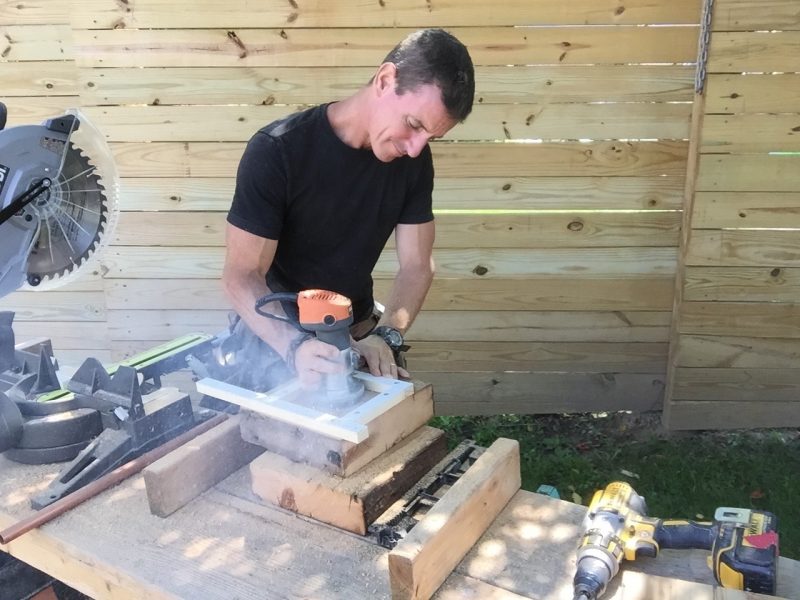
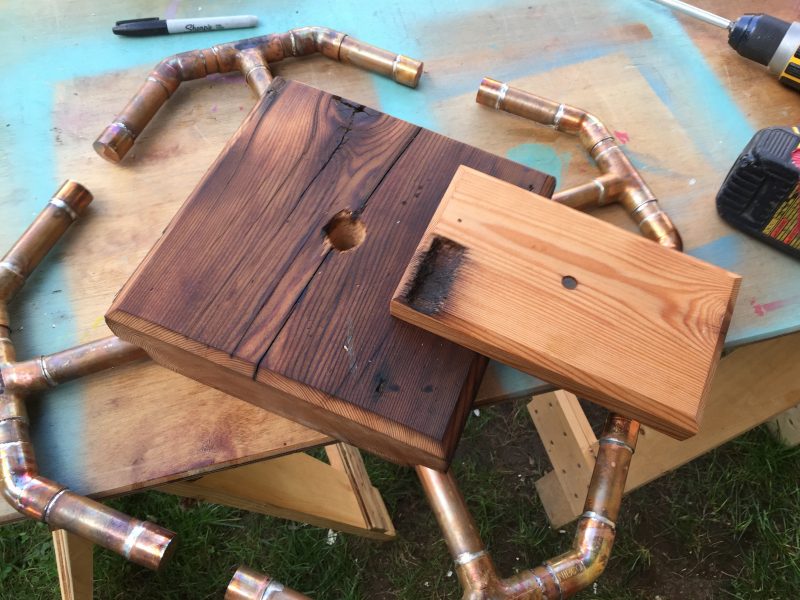
I have lots and lots of photos of me making the first iteration of this project. They’re all wrong. None are included here. I learned a bunch of things. Namely, I had to sculpt the portion of the clock that houses the movement from the outside in.Routing out the back of the ‘face’ blank. I had to make this part ‘backwards’.
To create a cavity for the movement to sit in, I routed out a 1-inch pocket in the back of second hunk of 3-by. The white pieces of wood are a router guide. I run the router against the guide pieces and then remove stock in the middle. If you’ve ever mortised a door hinge with a template, it’s kind of the same thing.
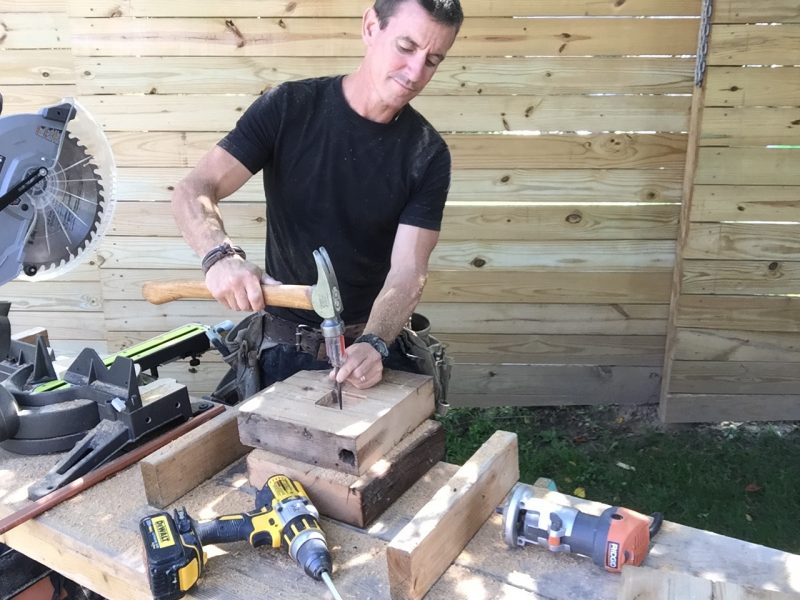
Mark and drill a hole for the movement armature. We’re not done yet. Make a hole in the center of the movement housing.
Because I bought a clock with a short little armature—I should have bought one specifically for this project and still might—I could only leave about 3/16-inch of wood between the movement (inside) and the front surface of the face (what you see). To do that, I laid out a piece, then cut the front off.Make the face. Come on, make the face.
If you’re a real woodworker, you might be having a nervous breakdown right now and I don’t blame you. I think I’m making myself nervous.
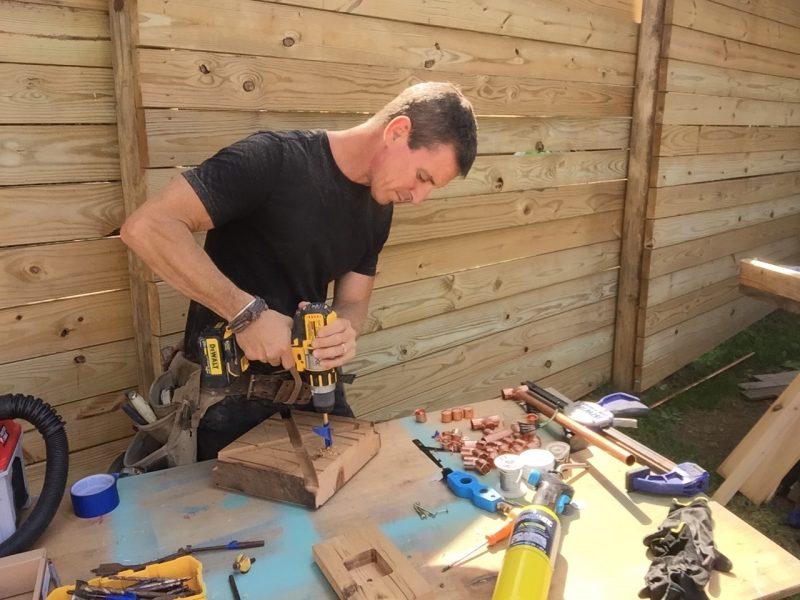
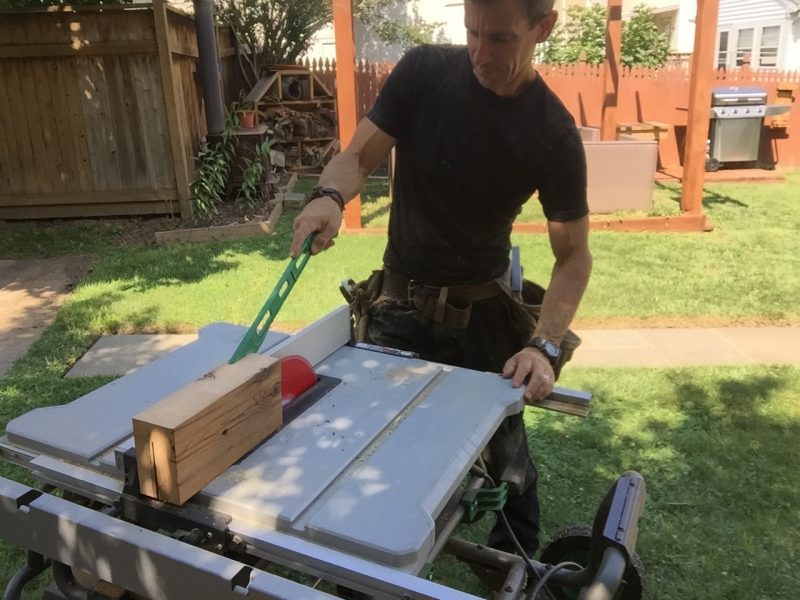
I attach the face to the body with screws set from behind the clock body. To make it work, I pre-drill the back of the body. Blue tape on the bit enables me to drill to a precise depth.Pre-drilling the face screws.
Also, I should own a drill press. I should. I don’t, but I should.
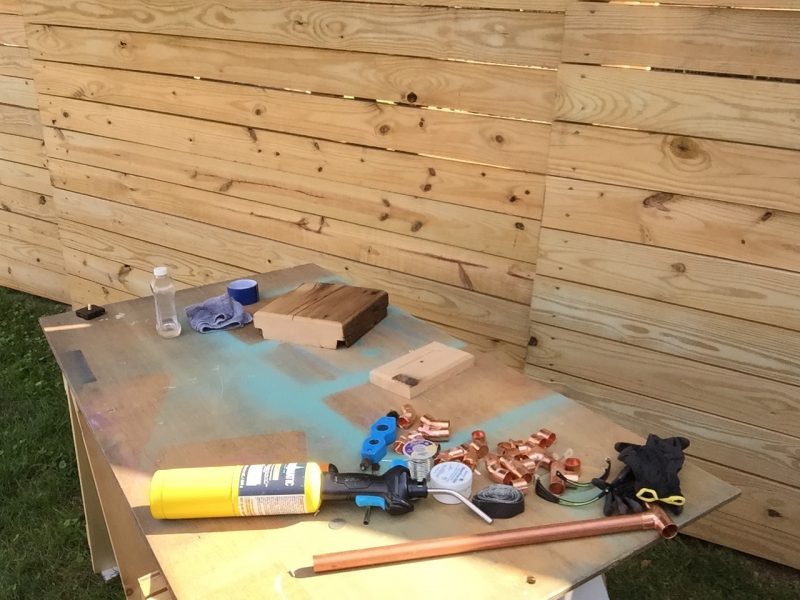
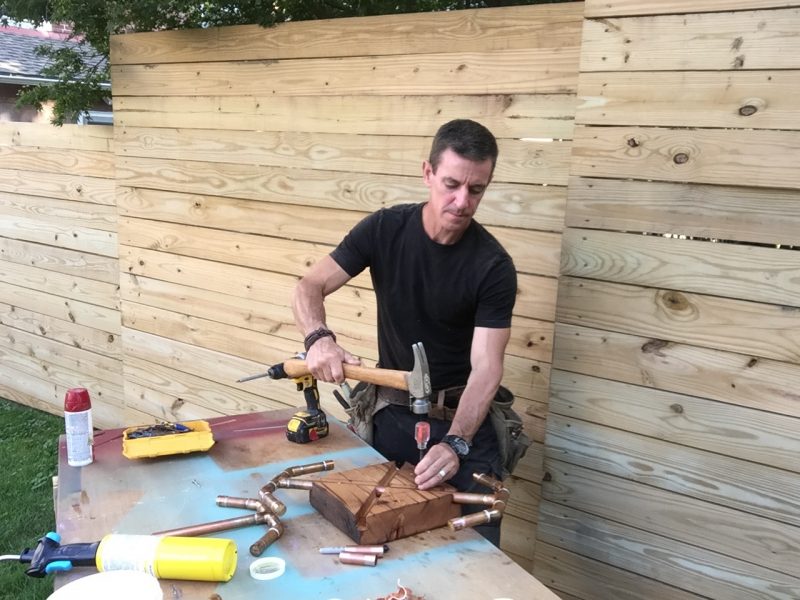
In this pile, the new Bernzomatic TS3500 torch head also worked great because it is, like, totally awesome. Also, if you look into the future, I organized all the parts by type so I was organized and I got all the interior/exterior surfaces with my Bernzomatic pipe fitting brush. It makes quick work of pipe prep.This is a pile of things.
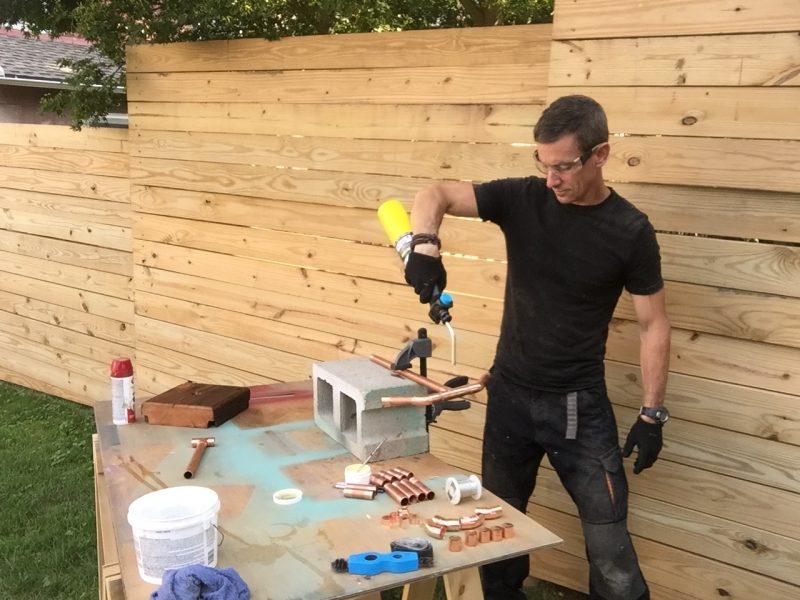
Lots of flux and solder in a small space. The TS3500—easy to use—was great in different positions heating the whole fitting as evenly as possible.Heat the whole fitting assembly as uniformly as possible by keeping the torch in motion.
I’ve always respected plumbers, and this is another reason why. My solders work, but they aint pretty. And that’s OK. They look good on the other side so I’ll keep the drips and runs hidden.Using a screwdriver to move the work piece to the cooling area.
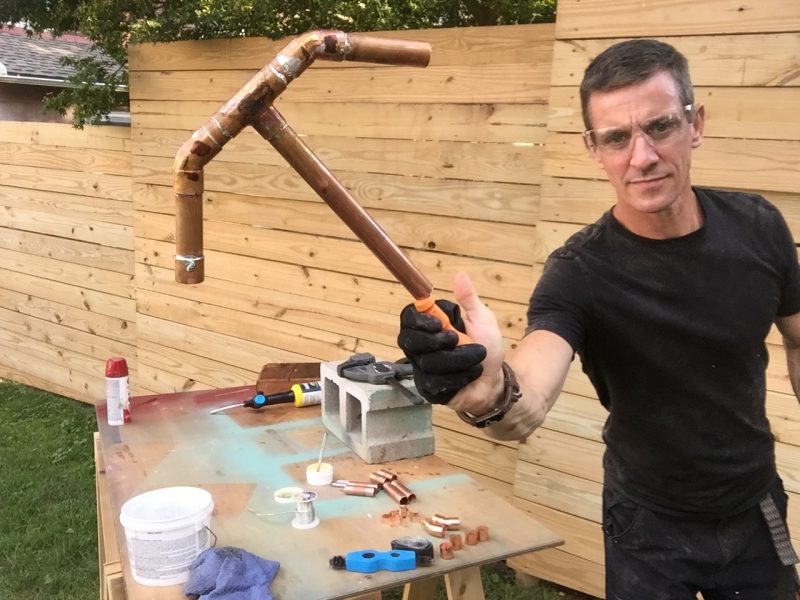
Fretwork is technically ornamental cuts in wood, but I’m borrowing the phrase for the soldered pipe ‘trim’ here, which I love. To attach it, I dimpled some holes with my scratch awl, then drilled some bigger holes and through those hole I bombed in some screws through the pipe. Gotta start the hole with a dimple or the drill bit just skates off the pipe.Attaching the fretwork.
Remove three of the four screws in back and the clock face swivels on the fourth screw so you can access the movement inside. The clock’s face ‘swivels’ on one of the 4-screws in the back to access the movement to change batteries and such.
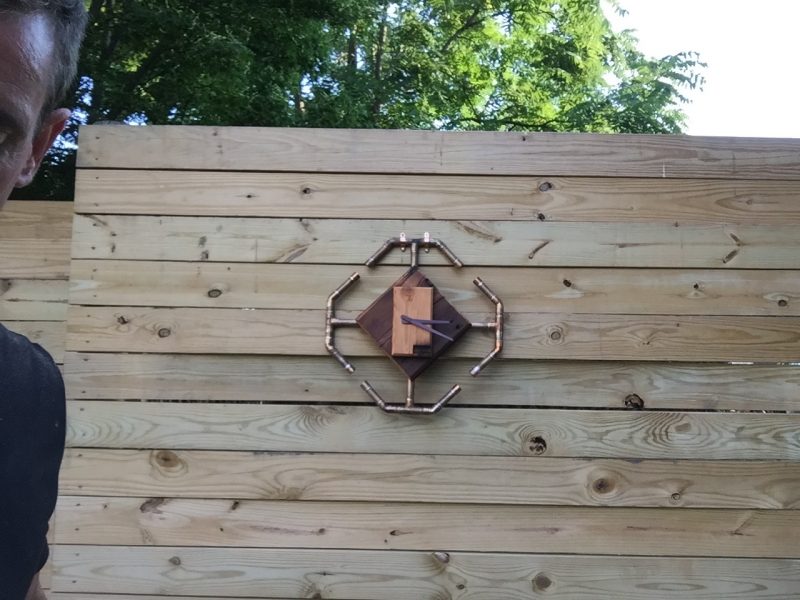
Me, trying to get out of the shot. Failing. Because I’m exhausted from about 20-false starts.The clock hangs by two pipe collars. Boom, what time you got?
I’m stoked I stayed with this one. I love the material mix, blend of basic shapes and geometry. Each ‘fret’ (I’m pretty sure I’m just making up words now) goes like this: 3/4-inch pipe > Tee > short pipe section > 22.5 degree elbow > Longer pipe section > Pipe cap
I oiled all the wood with boiled linseed oil. I’ll apply a coating of Minwax spar urethane after that sets up in a day or so.
So, this is how I make a clock with found items and my Bernzomatic torch of awesomeness. A Clockwork Clement.