As a woodworker and a maker, one of the projects I have had on my bucket list for a while has been a resin and wood end table. I have spent months scouring lumber yards and the internet for the perfect piece in need of TLC. And, well, when you wish and try hard enough dreams do come true. I am beyond excited to have been able to partner with my amazing friends at Bernzomatic to finally create the one of a kind resin table I’ve been imagining up in my head! I’ll show you how surprisingly easy it is to fill voids in wood with resin and create awesome art work in just a few easy steps!
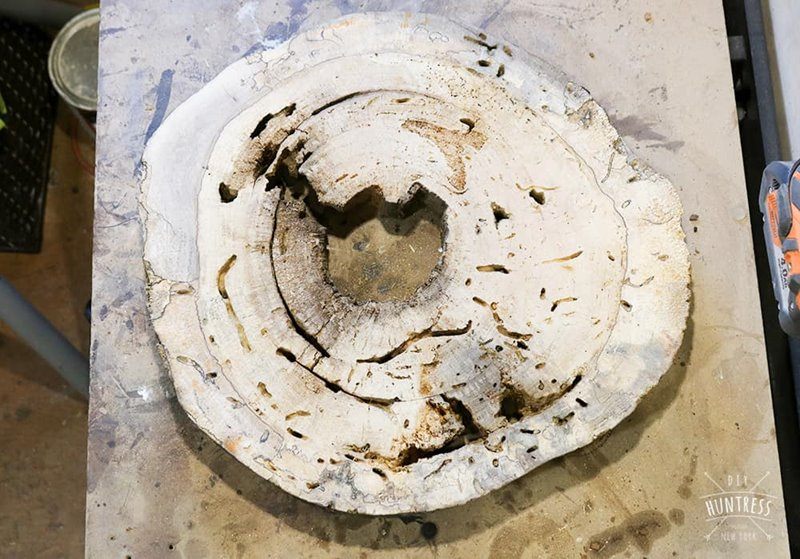
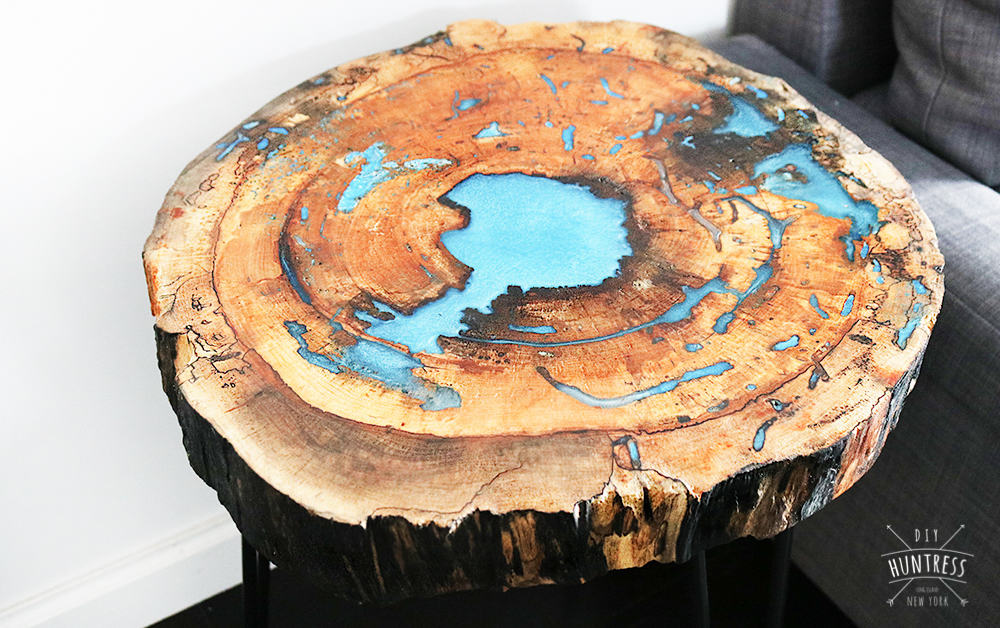
I would be lying if I said that I was intimidated by pouring epoxy resin for the longest time. But, now that I’ve done it and created something really cool, I can share that I was surprised by just how easy it was! With the right tools you can create your own original design. Here’s how I turned this…
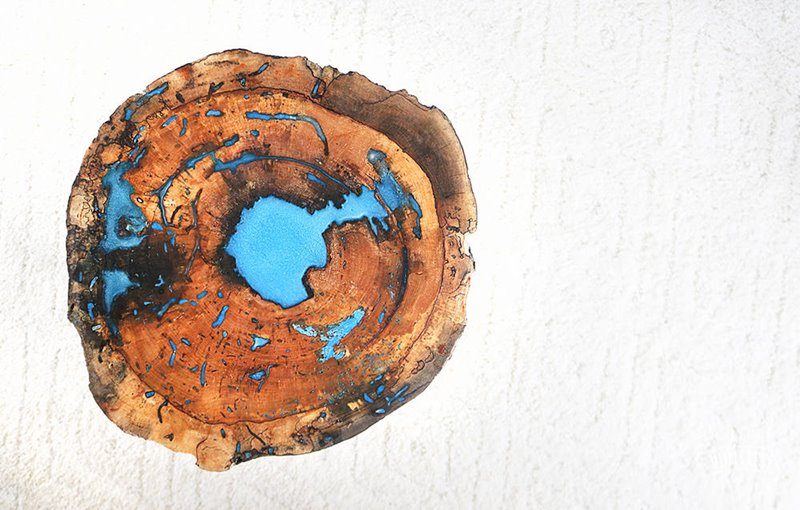
Into this…
Directions
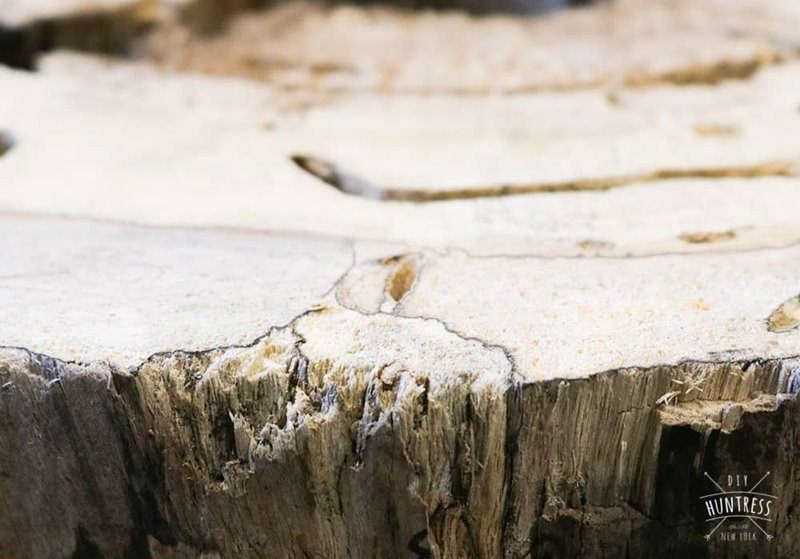
1. Use a sander to smooth and level the top of your future table top.
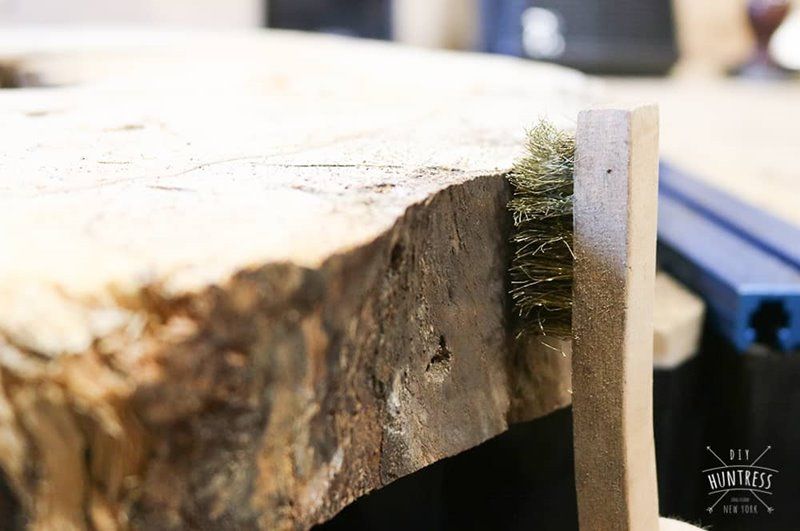
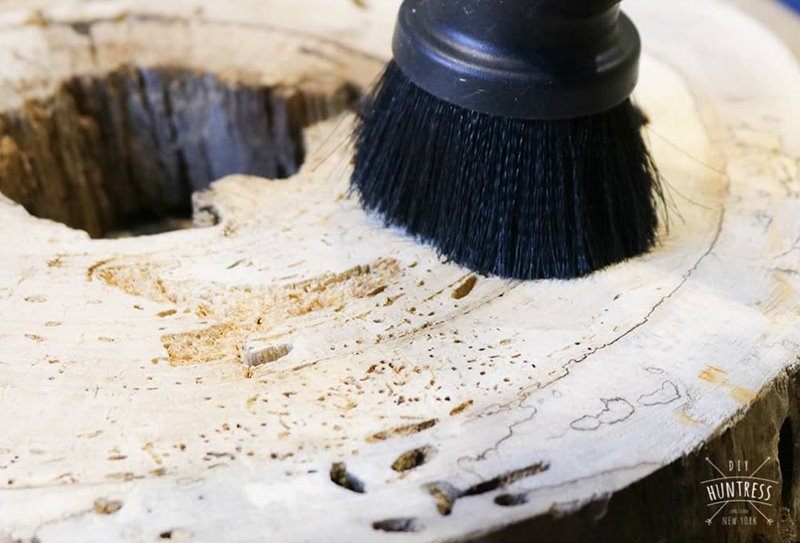
2. While things are still dusty, use a wire brush to scrape away some of the bark.
3. Next, use a vacuum to suck up any dust that has gotten trapped in the nooks of your piece.
4. Once your piece has been smoothed out, you can begin prepping for your resin pour. First, cover the entire top of the slab with packaging tape.
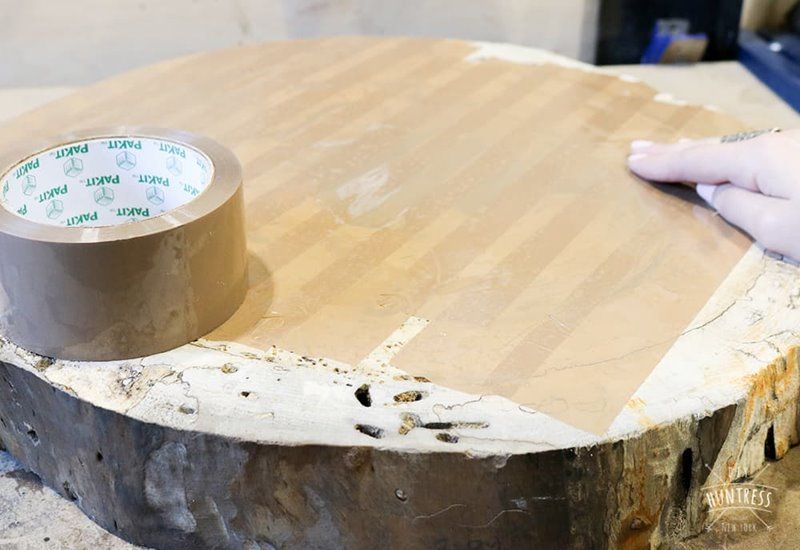
5. To help the tape stick better, use your Bernzomatic TS4000 to generate heat above the tape and help the adhesive glue on the tape melt to the piece. Disclaimer: It’s really important here that you do not touch the flame to the tape. Just hold the flame above the piece and move it back and forth.
6. Once your table top has been taped up, flip it over. You’re ready for your first pour!
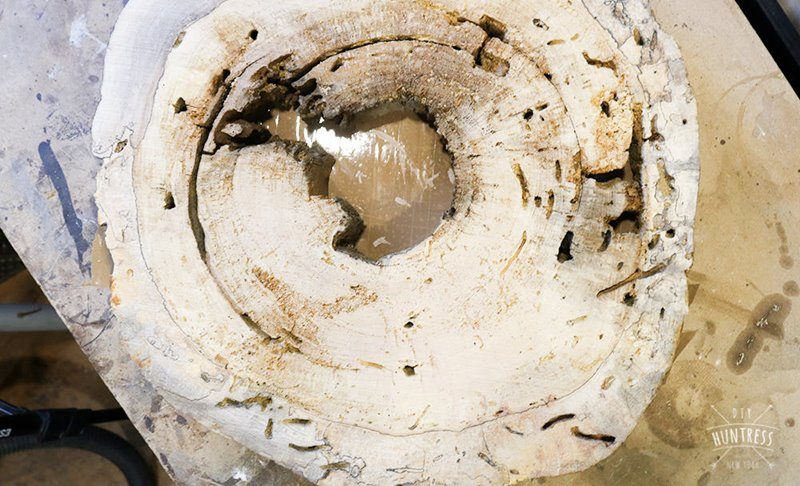
7. Follow the instructions on your specific epoxy resin product prior to mixing and pouring. Mine was a 1:1 ratio of epoxy resin to hardener and I added a metallic blue pigment to the mix.
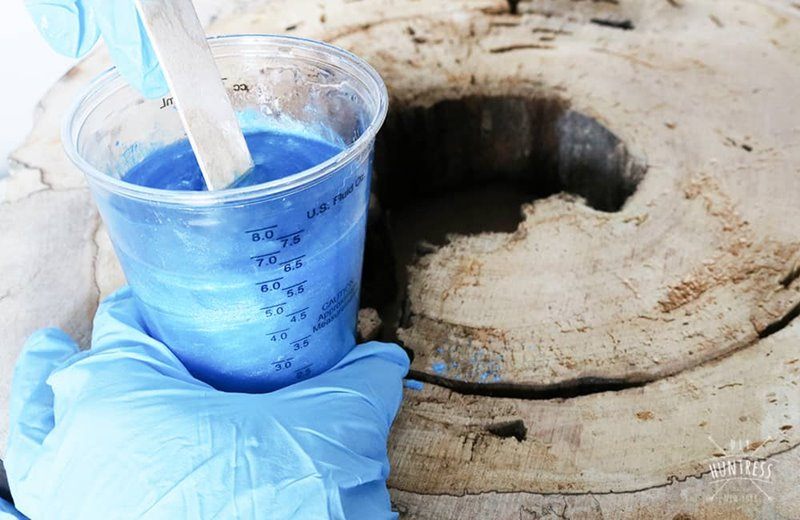
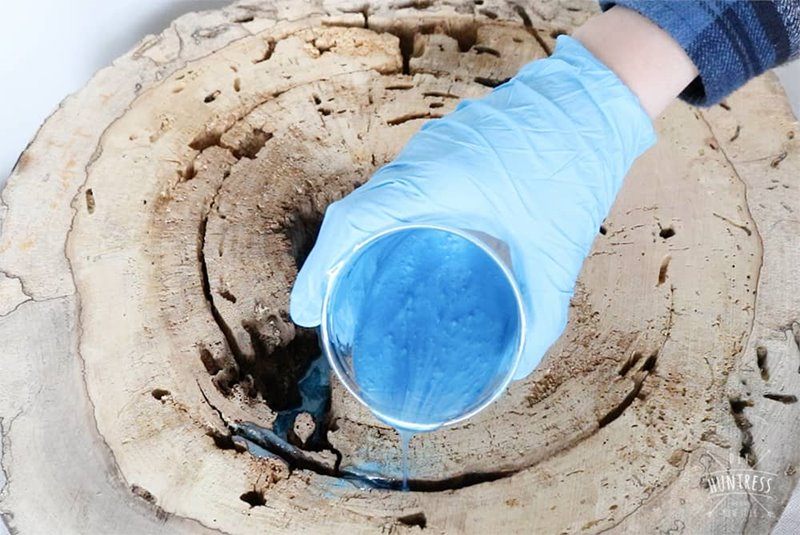
8. Once your resin is mixed, slowly begin to pour it into your table top. The particular resin I was working with only recommended I pour up to 1/8″ with each pass at a minimum of 4 hour increments. So, I repeated this step a few times over the course of two days.
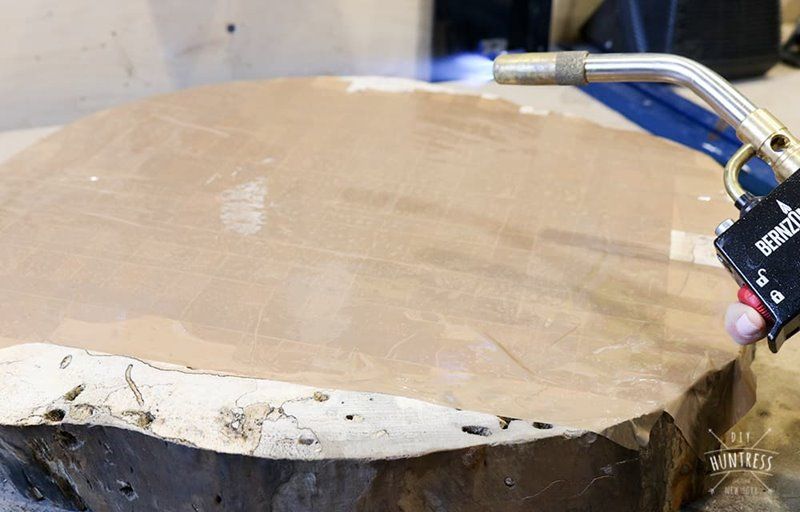
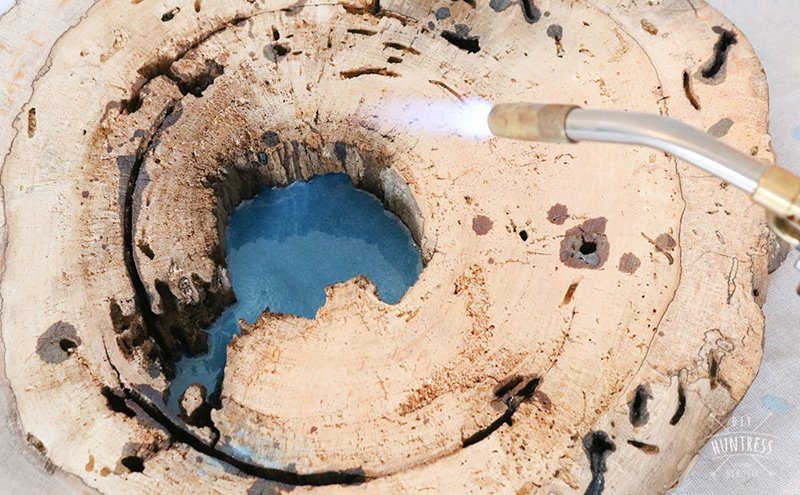
9. Immediately following each pour, make sure to use your Bernzomatic TS4000 to remove the bubbles that will form in the resin. As with the tape, gently float the open flame above the work piece. The heat generated during this step will pop any bubbles that have formed in the resin.
10. Channel your inner monk, practice patience, and repeat steps 7 through 9 as many times as necessary to ensure a solid, sturdy, and beautiful pour (this was also the most difficult step for me because I wanted results immediately).
11. Once you have completed your major pours and everything has dried according to the directions of your resin, flip the piece over and remove the tape. If your tape is leaving behind residue, use rubbing alcohol to help remove it.
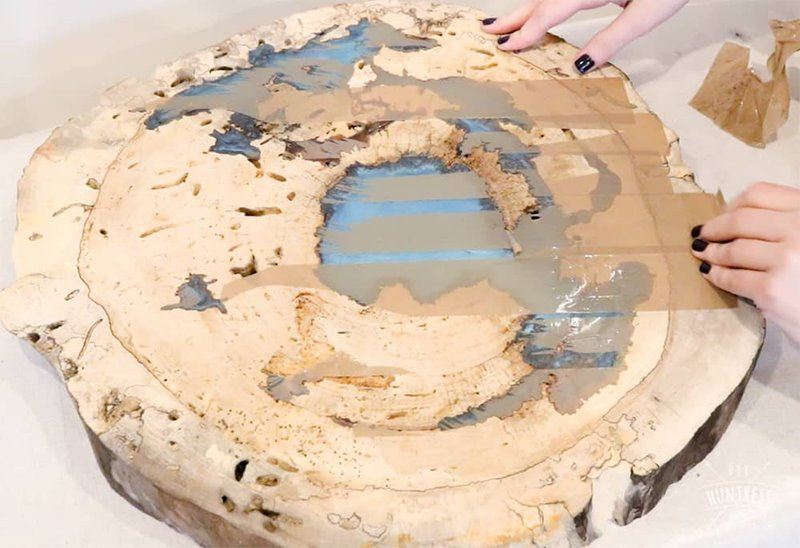
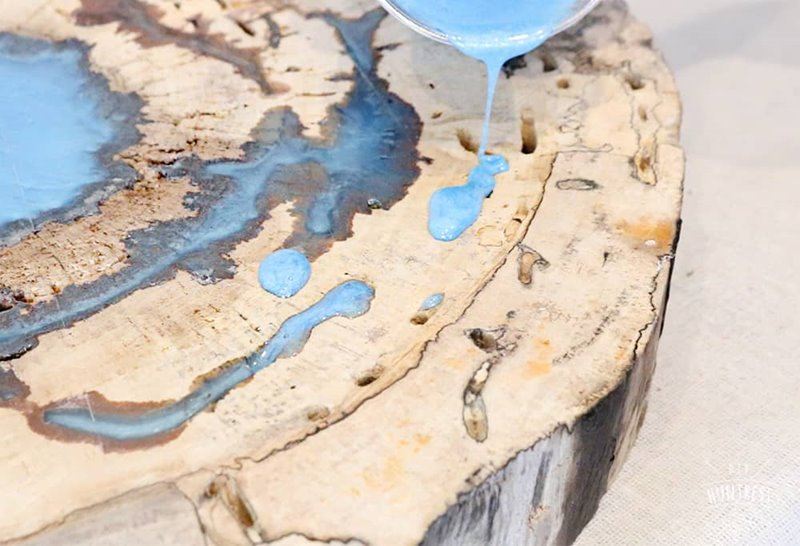
12. Now, repeat your resin steps on the front of the piece (if necessary). I had small voids I wanted to fill, so I worked in small sections with the resin and my Bernzomatic TS4000 torch.
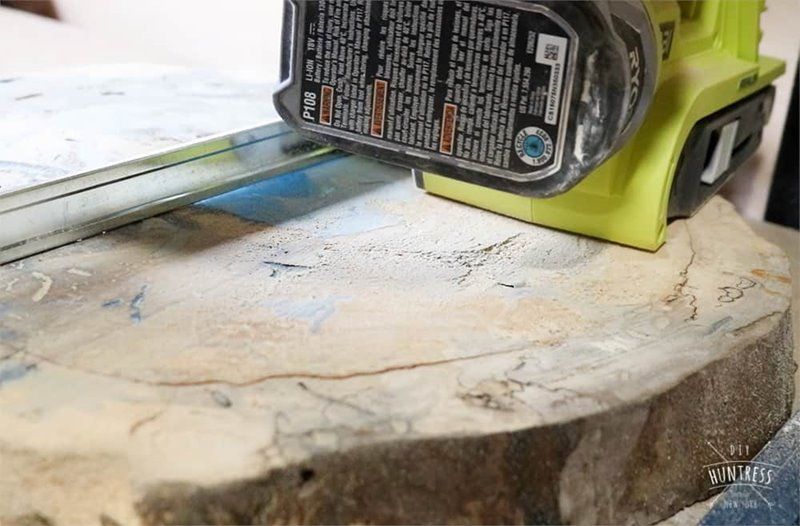
13. Once everything has dried, use a belt sander to remover the dried, excess resin from the top of the piece. You will have to sand a lot here. So, again, patience will become a virtue. I sanded with 80 grit sandpaper until all of the leftover resin was gone, and then gradually worked my way to 400 grit with my random orbital sander.
Important: Resin is extremely hazardous to your lungs, so please wear a respirator and utilize appropriate dust collection methods throughout this process.
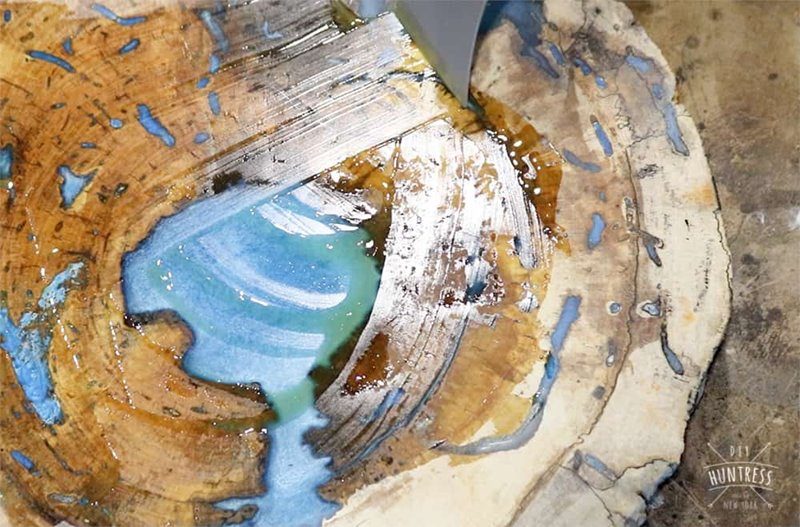
14. Once your piece is sanded to your liking, remove all dust and apply a finish to protect the work and help it shine.
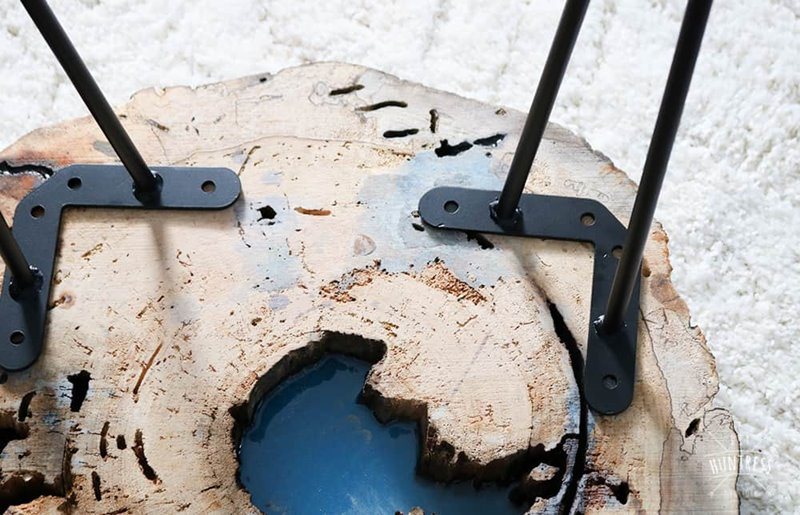
15. Last, add your legs!
Now admire that handy work, invite your friends over for a party, and maybe even do a happy dance!
With the right tools, resin projects can be fun and easy! I am so happy with the way this turned out, especially knowing that there is nothing else in the world like it. I can’t wait to create my next piece!