This DIY Wall Key Holder Using Wood and Epoxy is a fun and rewarding project. The idea behind this keyholder is to make it quirky and colorful, so it was more like art on the wall than a utilitarian key hanger.
Directions
1. Cut the Wood
I used a miter saw to cut the hexagons. We explain exactly how to do this in the video above. The process is straightforward and needs only a couple of measurements to set up before you can cut all the hexagons.
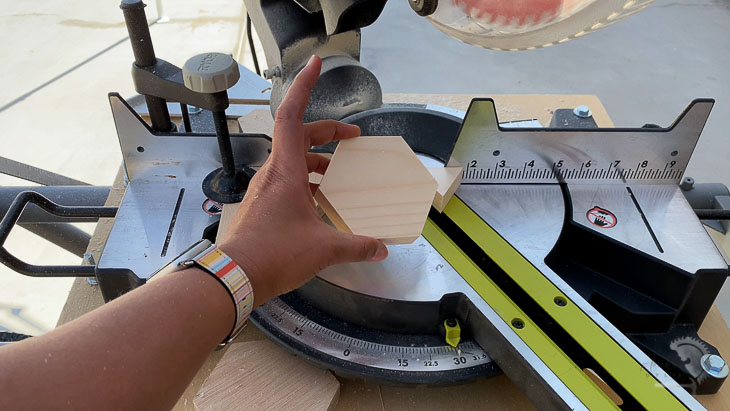
For the large board, I used a 1x10 board cut at 20".
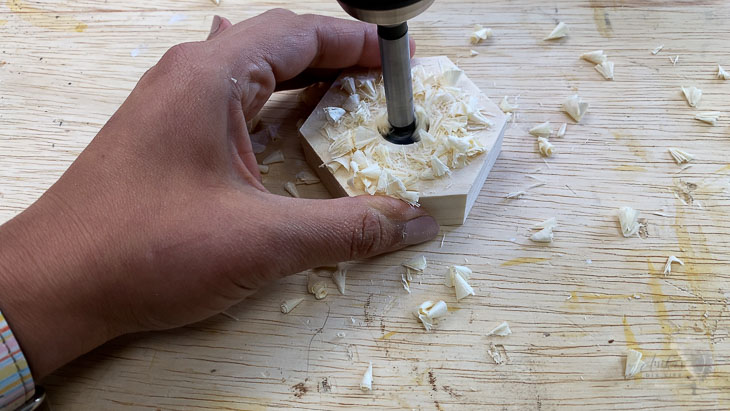
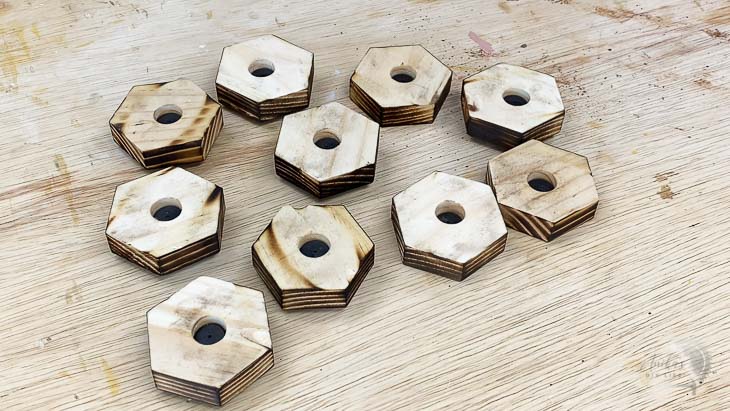
2. Embed magnets
Using a Forstner bit that matches the magnet's size, make holes about three-fourth way deep in the hexagons.
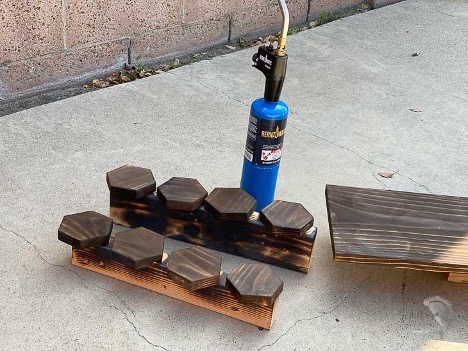
3. Prepare for burning
Sand all the surfaces with 150 grit to get it ready for Shou Sugi Ban. Set it up on a non-flammable surface away from anything that can catch fire easily. We set up on my concrete driveway.
4. Torch the wood
Using the Bernzomatic BZ4500HS Heat Shrink Torch and the Bernzomatic propane tank, torch each piece of wood.
Torch the various pieces to varying degrees to get an ombre look – We went over a few one time, some a couple of times, and some 4-5 times till they were nice and dark.
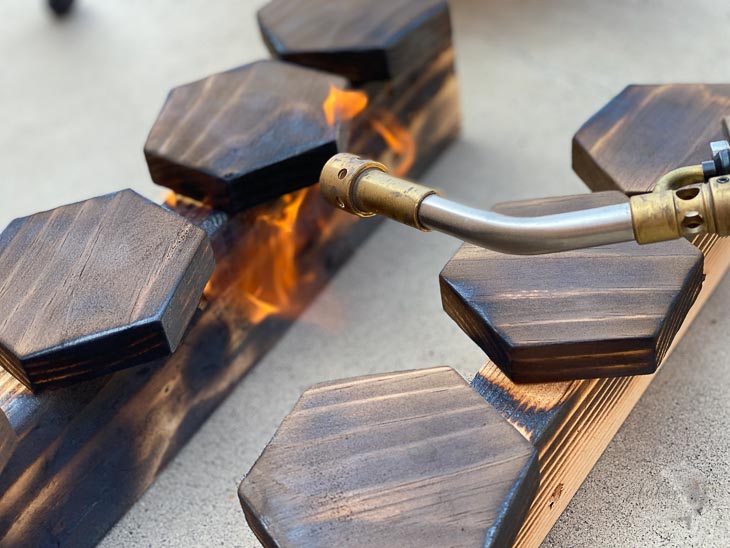
Also, make sure to torch all sides of the hexagon pieces and the board.
Tip – Keep the Torch moving slowly across the surface for a uniform look.
5. Add the Magnets
6. Put everything together
Arrange the hexagons in the pattern you like and glue them down using wood glue.
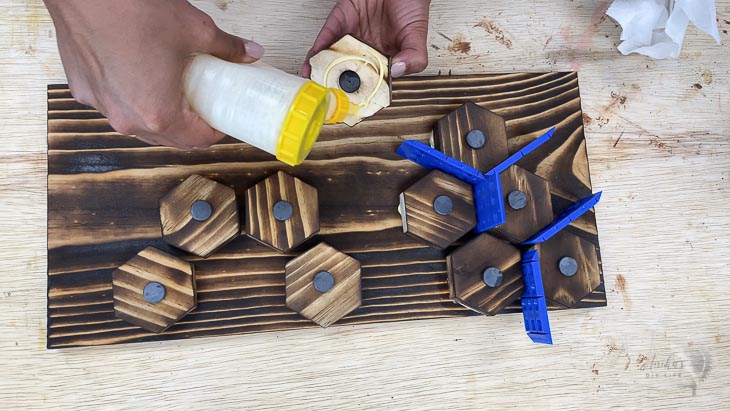
We staggered them and made sure that the wood grain for each was oriented in various directions.
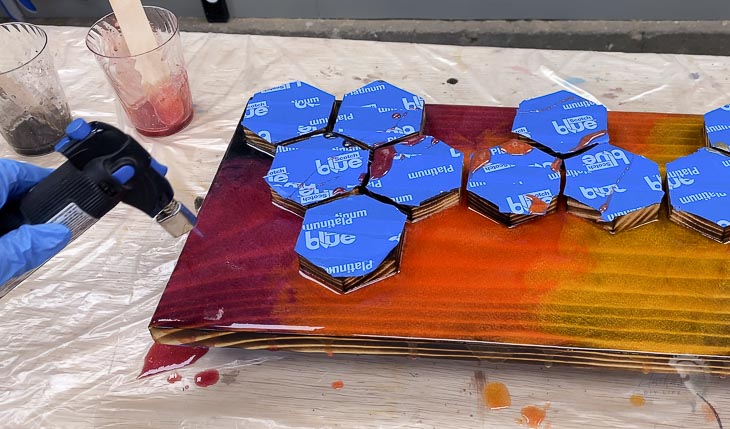
7. Epoxy pour
Prep the boards by covering the bottom edge and all the hexagons with masking tape.
Mix up epoxy with black, pink, orange, and gold pigments and poured them one by one to create a gradient pattern. Ending in a clear epoxy pour.

Give the bubbles a couple of minutes to rise and use a Bernzomatic detail torch for popping them.
Once the epoxy is cured, remove all the masking tape. The tape easily lifts away any stray epoxy drops. Make holes and attach hooks. Add hangers at the back and hang it up on the wall!
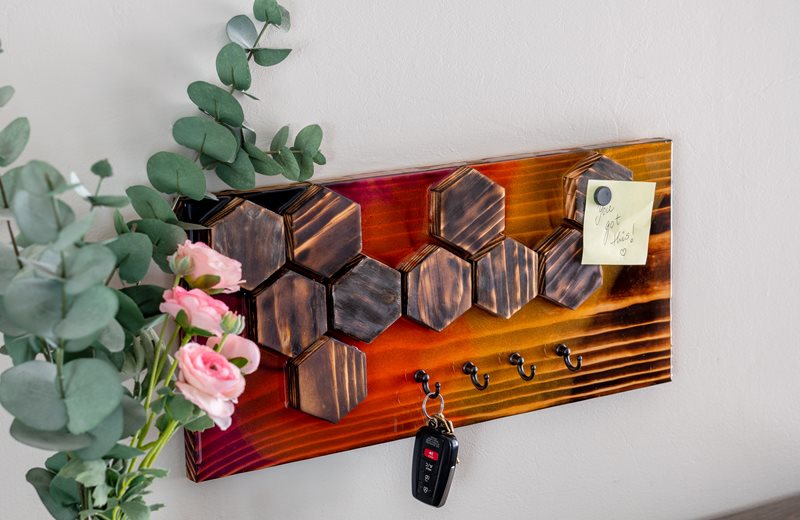
It is beautiful and extremely functional with the hooks for the keys (or masks) and the magnetic tiles.