Directions
Step 1: Milling
I built this boombox out of solid Walnut, so I started by breaking down my rough lumber into the individual pieces. If you wanted to simplify this build, you could use sheet goods like plywood or MDF, or just buy pre-milled lumber.
After cutting the boards to rough length at the miter saw, I squared them up on the jointer, planer, and table saw.
I purchased 6/4, or 1 ½” thick, Walnut for this build and wanted a final thickness of ½” on these boards, so next I needed to resaw all of my boards, basically splitting them in half.
Step 2: Resawing
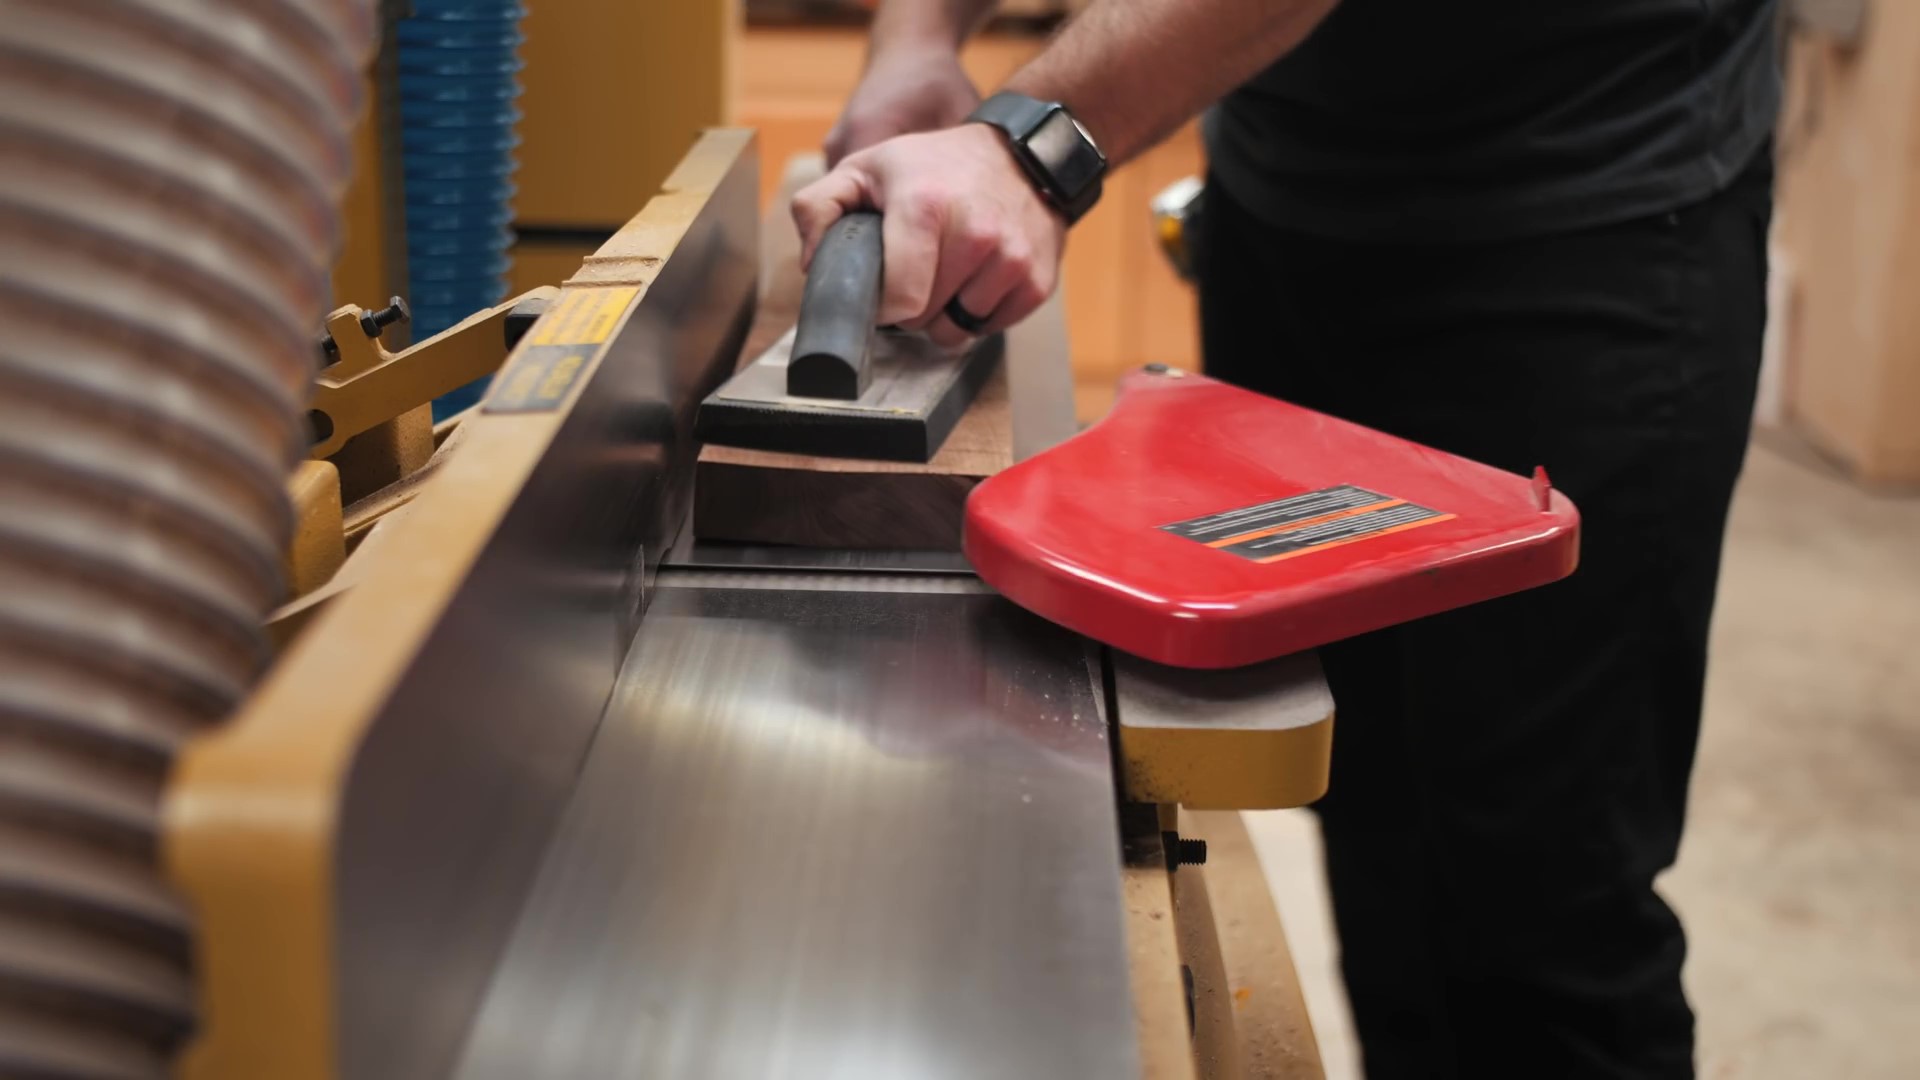
The resaw blade on my bandsaw was extremely dull, so I decided to do the bulk of the resaw work at the table saw. To do this, I first marked the center of the board using a marking gauge and then set the fence so the blade would pass through the middle of the board. I also added a featherboard to help keep the board pushed against the fence.
I wanted to make this cut in multiple passes, so I started with my blade about an inch about the table and made the first pass. I then flipped the board end for end, making sure the same face was against the fence, then made the pass on the other edge of the board.
I repeated this process for all of the boards, then raised the blade high enough so that about ¾” of material would be left in the middle of the boards. I didn’t want to cut all the way through at the table saw, just remove the majority of the waste. I repeated the steps with the higher blade and then moved over to the bandsaw.
I set up another featherboard at the bandsaw to help keep pressure against the boards, and then resawed all of the boards, splitting them completely.
Finally, at the planer, I could get the boards totally flat and remove the small ridge left in the middle of the boards.
Before gluing up the panels, I needed to trim some of the boards and remove some areas I didn’t like aesthetically, like these sapwood areas.
Step 3: Orienting Boards
Once all of the boards were cut to size, I arranged the boards in the orientation I thought looked best and then labeled them so I wouldn’t get them mixed up during the glue up.
The last step before the glue up was to joint each edge, to make sure I got perfect glue lines. I used this little trick I picked up from my buddy Jay Bates, where you joint two mating boards with the opposite face of each board against the jointer fence.
You can see I faced my pencil line towards the fence on the first board then away from the fence on the second board. This effectively negated any minute error in the squareness of my fence, and ensured that I ended up with a flat panel.

Step 4: Glue up and Milling
Finally, I could glue up the panels. I didn’t use anything for alignment on these boards, mostly because there were so many of them, and I made sure to add clamps to the ends of the seams to help keep them in line.
After letting the boards sit in the clamps for a few hours, I scrapped off the glue and then passed them through the planer to get them cleaned up.
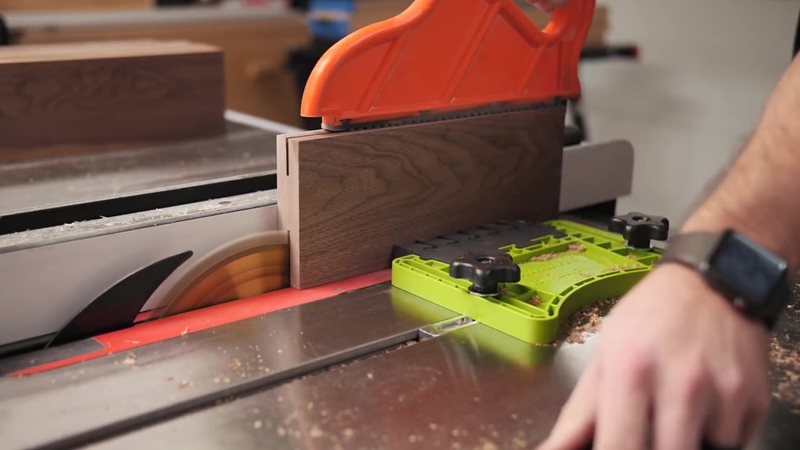
With the boards cleaned up, I could rip the top, bottom, and side panels to final width at the table saw, again using a featherboard to help keep consistent pressure against the fence.
Next, I set my blade to 45 degrees and started cutting in the miters. First, I cut a miter on one end of each of the boards that made up the frame of the box.
With one end cut to 45 degrees, I then set up a stop block on my miter gauge to cut the miter onto the other end of the boards. This ensured that my top and bottom panels, along with the side panels, were all exactly the same length.
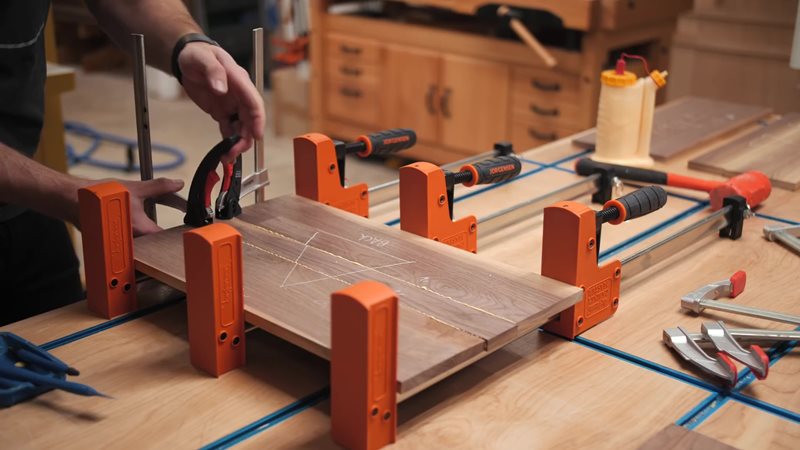
Finally, I could glue up the box, and I used a combination of strap clamps and corner clamps for this. I ended up with a perfectly square box and gap free miters, which is always nice.
With the box frame glued up, I could cut the front and back panels to final size based on the final size of the frame, and I did that over at the miter saw.
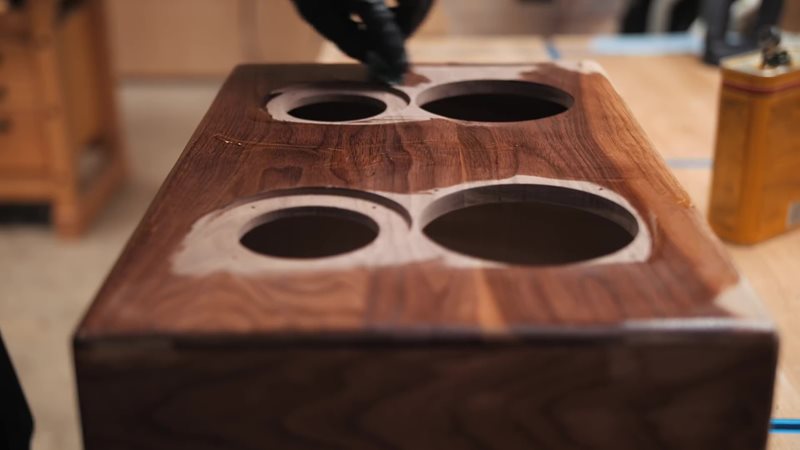
Step 5: Speaker Holes
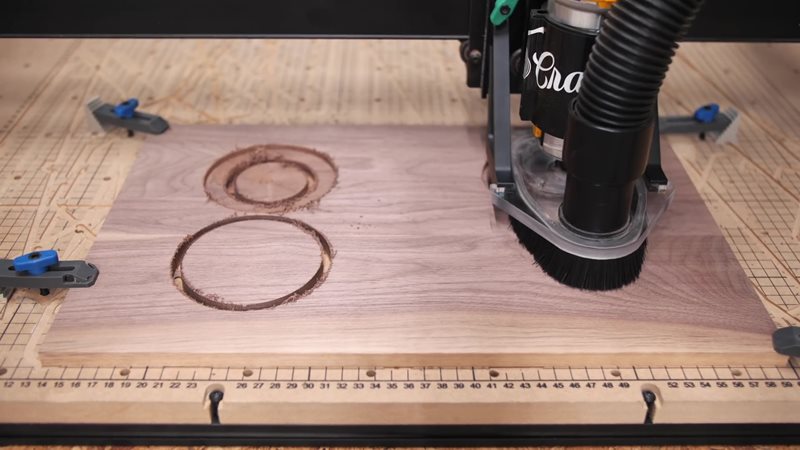
Next, I needed to get the holes for the speakers cut into the front panel. The speaker kit I used, the C-Note kit from Parts Express, comes with MDF enclosures and you could easily use a flush trim bit and use those enclosures as templates to cut these holes, but I figured I’d let the X-Carve do the work for me.
I modeled up a quick design in Easel, Inventables’ free CAM software, and did a test cut on a piece of ½” plywood to make sure everything would fit right. Once I got everything fitting correctly, I made the final cut on the Walnut panel. This whole operation only took about 13 minutes, super quick with a ¼” bit.
After the X-Carve finished, I cut the tabs holding the leftover pieces in place and then cleaned everything up with a spokeshave and some sandpaper.
Step 6: Routing
I wanted to recess the front and back panels into the frame slightly, to give the panels a more secure kit, so next I set up my router table to cut a ½” wide by ⅛” deep rabbet. I cut these rabbets onto all four edges of the front and back panels, making sure to cut the rabbets on the long edges first to help prevent blowout on the end grain.
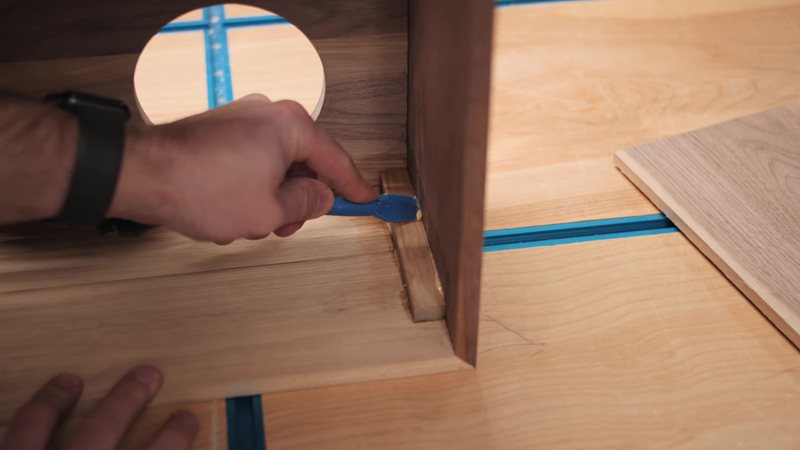
Next, I glued the front panel onto the frame, and I made sure to use plenty of glue and clamps for this. You want an airtight seal on speaker boxes, so you really can’t go overboard with clamps.
I knew I wanted a heavy roundover on all of the edges on this speaker box, and that would mean removing a good bit of material from the corners. Because of this, I wanted to reinforce the corners and I just used some blocks on the inside of the speaker box to do this.
I used a combination of CA glue and wood glue to attach the blocks, and the CA glue would basically hold the blocks in place while the wood glue dried.
I also needed to add some more blocks to the inside of the top and bottom panels, and these are where the screws that attach the back panel, which I wanted to be removable, will connect.
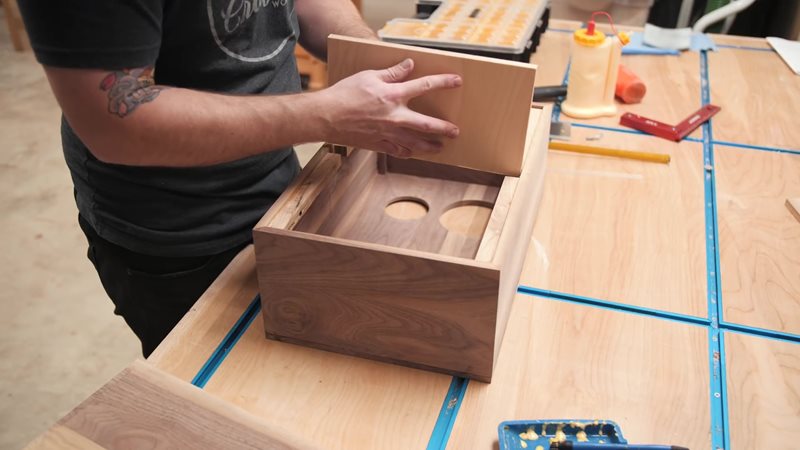
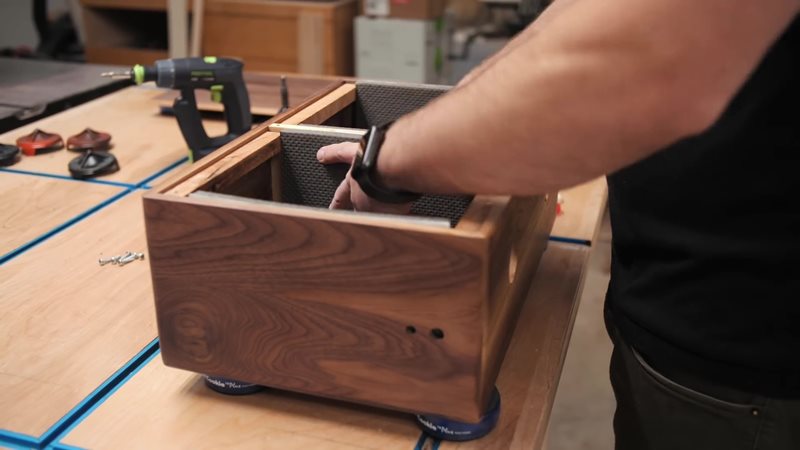
Step 7: Center Divider
The last piece to add to the speaker box was the center divider, which I frankly kind of forgot about. You can see that I needed to notch out the blocks on the top and bottom to make room for the divider, which I cut out of ½” Baltic Birch plywood. Again, I made sure to use plenty of glue here, as I wanted an airtight seal.
I also needed to add another rabbet to the center of the back panel, so that it didn’t interfere with the center divider, and I cut that at the table saw.
I clamped the back panel in place, pre-drilled and countersunk holes then added 1” screws to hold the back panel in place.
Step 8: Final Shaping
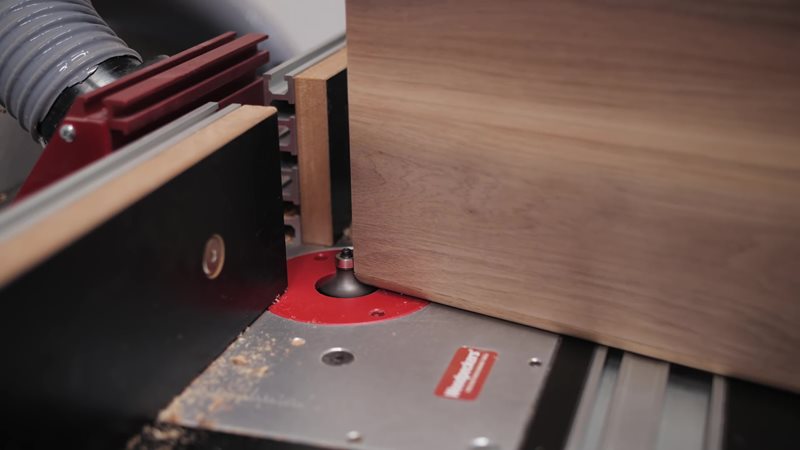
With the box built, I could move on to getting it cleaned up. First, I used a flush trim bit on the router table to clean up any overhanging areas on the front and back panels, which I cut slightly oversized.
Once the edges were flushed up, I swapped over to a ⅜” radius roundover bit and added a roundover to all of the edges of the box. I am always amazed at how much of a difference a heavy edge profile like this makes, and I really think this roundover made the look of the speaker.
Finally, I could install the speakers, which was simple. I just made sure the screw holes were square to the cabinet and used a self centering drill bit to pre-drill holes. I then used ¾” black screws to attach the speakers, and could get a beauty shot for my social media.
Step 9: Soldering
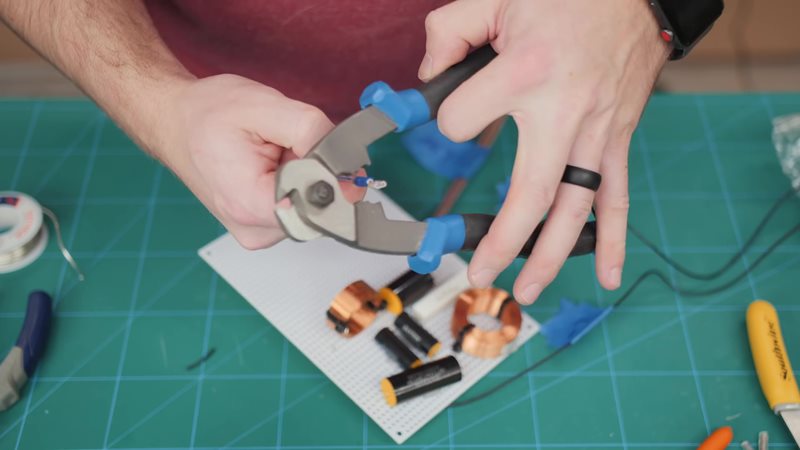
Next up in the build was the part I was a little nervous about, building the crossovers. This was my first time soldering, and there were a ton of connections to solder here. In case you don’t know, crossovers split the audio signal between the woofer and tweeter, sending the higher frequencies to the tweeters and lower frequencies to the woofers.
Again, these crossovers were part of the C-Note speaker kit I used for this project, and there are extremely detailed instructions on how to wire the crossovers included with that kit. Basically, I needed to connect the different components of the crossover itself and also add wiring to connect the crossovers to the speakers as well as the amp.
While I’m soldering, let’s talk about the sponsor of this week’s video, Bernzomatic.
I used both the Bernzomatic ST500 cordless soldering iron and ST2200T detail torch on this project, and they’re both perfect for use on soldering jobs. Both torches are butane powered, which means they’re cordless and completely portable, perfect if you need to solder something away from an outlet.
I also used Bernzomatic rosin core electrical solder for this project, which was extremely simple to use, no flux required. Whether you are a professional tradesman, DIYer, artisan, crafter or chef, Bernzomatic has the right product for countless projects.
After soldering the power jack to the leads from the amp board, I could strip the ends of the speaker wire and add these crimp terminals to easily connect the speaker wire to the speakers.
Step 10: Drilling
With all of the wiring complete, I could move on to adding holes for the various ports, LEDs, switches, and the carrying handle. This was one of the more tedious parts of the build, as a lot of these components had different size posts, so I had to use a caliper to find the correct drill bit size to pre-drill the holes.
I also needed to use a Forstner bit on the inside of the cabinet to allow the components to feed through. Most of these parts only had a threaded area of about ¼” in length, so I had to recess these holes to allow the threaded areas to protrude through the cabinet.
I also added some rubber feet to the bottom of the speaker cabinet, to keep it from rattling when playing music.

Step 11: Ports
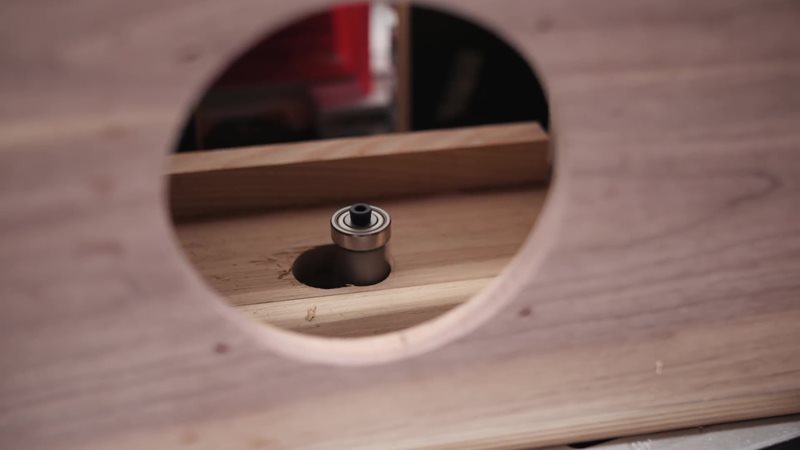
The last holes I needed to drill were for the ports on the bottom of the cabinet. These ports were 1 ¾” in diameter, and I don’t own a 1 ¾” drill bit, so I needed to get a little creative here.
First, I drilled a 1 ¼” hole, the closest size bit I had on hand, with a Forstner bit, then used the X-Carve to cut a template. I then mounted a flush trim bit in my router table, attached the template to the bottom of the cabinet with double stick tape, and routed out the hole.
Obviously, you could just buy the correctly sized Forstner bit, but I couldn’t find one locally, this saved me twenty bucks, and I thought it was a clever solution.
Step 12: Finishing
With all of the holes drilled into the speaker cabinet, all that was left to do was to sand everything up to 180 grit and prep for finish.
For the finish, I went with a wipe on polyurethane, mainly because I had just enough left in the can to use it up on this project. I wiped on three coats, letting the finish dry about 6 hours between coats. I just love the way the finish popped the grain on this Walnut, beautiful.
I also sealed the inside of the cabinet with spray polyurethane, which wouldn’t be necessary if I had used MDF or plywood for the box, but I figured this would help reduce seasonal expansion and contraction.
Once the finish dried, I could get to final assembly of the cabinet. First, I wanted to make sure the back panel had an airtight seal on the cabinet. I found this foam insulation at the home center which turned out to be perfect for this build. It’s peel and stick and I just made sure to run it along all of the rabbeted areas on the back panel.
When the panel is installed with screws, the foam compresses and forms a perfect seal.
Step 13: Final Steps
Next, I added this ½” sound damping foam to all of the inside faces of the cabinet except for the front baffle. The foam has a peel and stick backing and I just cut it to size with scissors, making sure to cut around any of the holes I had drilled earlier.
I could also get the crossovers and amp board mounted to the inside of the cabinet. I used screws to do this and just screwed them into the center divider.
I needed to add a groove to the center divider to allow the cables to pass from one side of the cabinet to the other, and I just used a round rasp to cut in the groove.
Finally, I could install all of the switches, LEDs, rubber feet, handle, and ports, attach the back panel, and then drop in the speakers.
With the speakers installed, this Boombox was finished and all that was left to do was try it out!