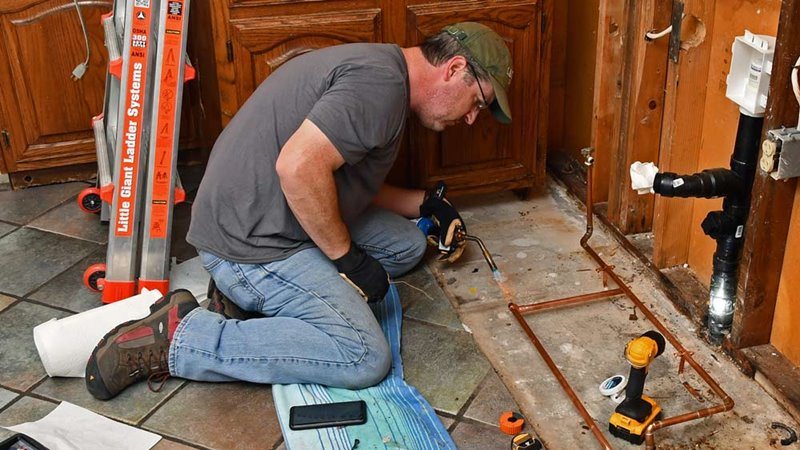
A deep kitchen remodel is one of the biggest Do it Yourself challenges to be had. It's got all the fun of any other room, plus the added excitement of plumbing and appliances. I had to move the locations of both water feed lines for the kitchen sink, super scary, right?
I'm no plumbing expert, but I've been building knowledge and skills as I knock around this old, home, trying to fix and upgrade some of the nonsense left by previous generations.
I thought about hiring a plumber for the project, but decided to take a long weekend to give myself plenty of time (and a quiet house) to tackle it on my own. Honestly, it was just a big pipe soldering project. I figured it was a CAN-do-it DIY.
Game on.
Why mess with this nonsense?
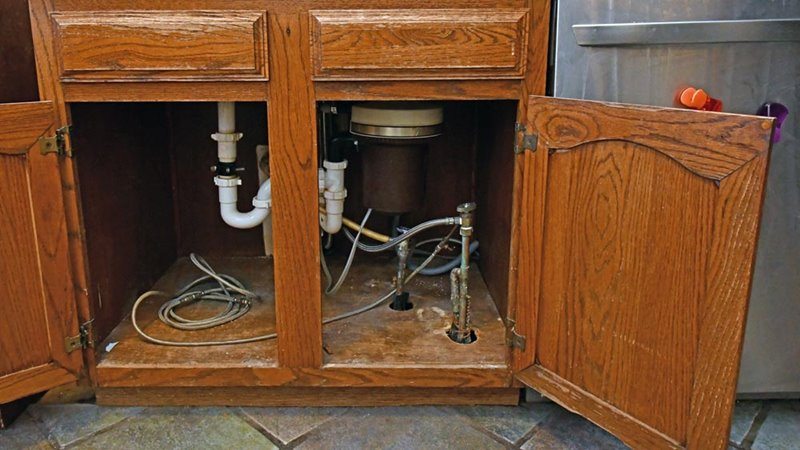
I'm moving the sink location over a foot and a half, which will cause the existing water lines to poke up into what will be the wrong future cabinet space, a drawer actually. Also, the existing lines extend crazily up into the front section of the base cabinet. Their locations coupled with the spaghetti of sink connections lines really screw up any storage usability of the cabinet.
It's a mess.
An Extra Challenge
I see a lot of "how-to" home improvement content detailing how to move water lines like these from below. It looks pretty easy; just go down to the basement and re-route the pipe to a new location. Drill holes up through the floor from below and stick the new stuff up. No problem.
Problem. Here's our deal. We're in a single story, on a cement slab, with no basement.
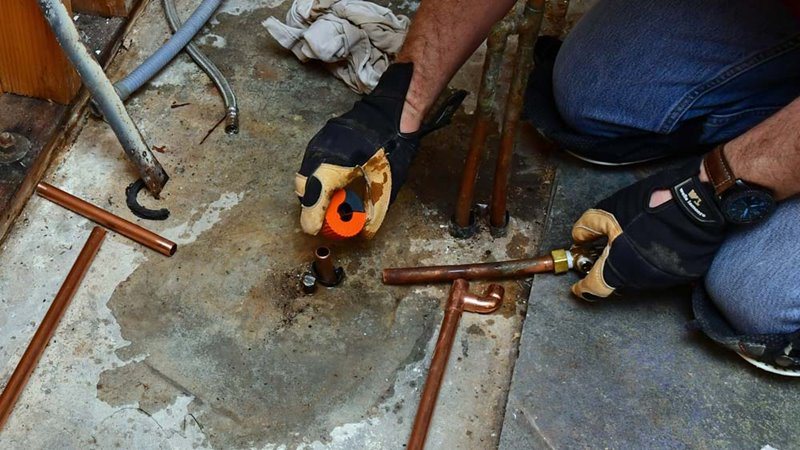
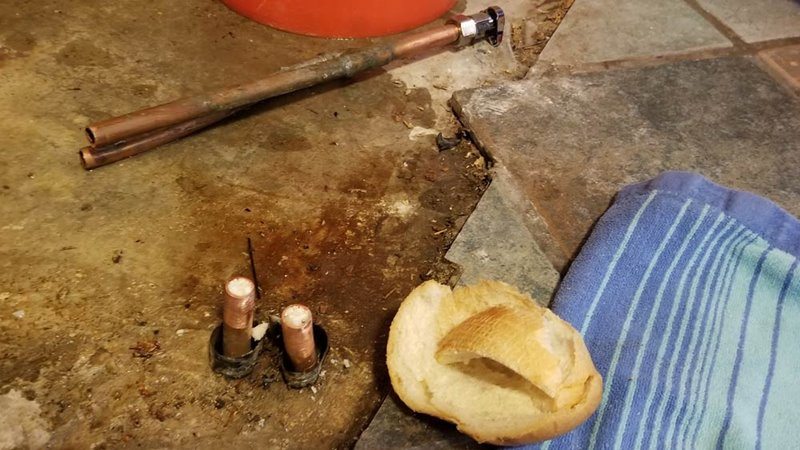
I tore out the bottom of the battered sink base to check things out. It wasn't good. The copper lines were crooked, corroded, and covered with age-old solder glop from the original install, nearly 40 years ago.
I considered cutting into the concrete floor, busting out a section, re-routing the piping and filling the resulting trench in with cement.
The prospect of busting into the floor was a little too scary for me. Not only is that a bit more of an advanced DIY than I'm comfortable with, I have to keep the household in working order. This is a long-term, live-in renovation.
Smashing through the slab to do subterranean plumbing isn't something I'm willing to tackle. Nope.
Directions
The New Route
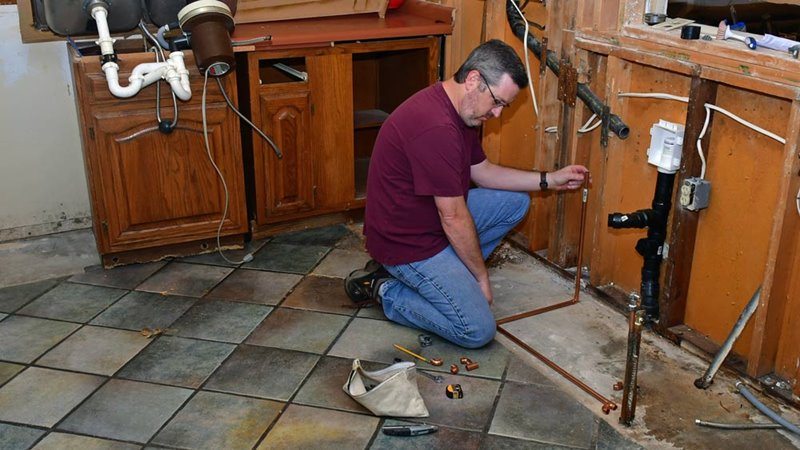
I decided to run the water lines in the empty space below the base cabinets. There'd be plenty of room, if I kept it somewhat close to the floor.
With the everything disconnected cabinets out of the way, I started laying out the piping to the new location, aiming to pop upwards in the back of the new cabinet location, hot and cold lines on either side of center.
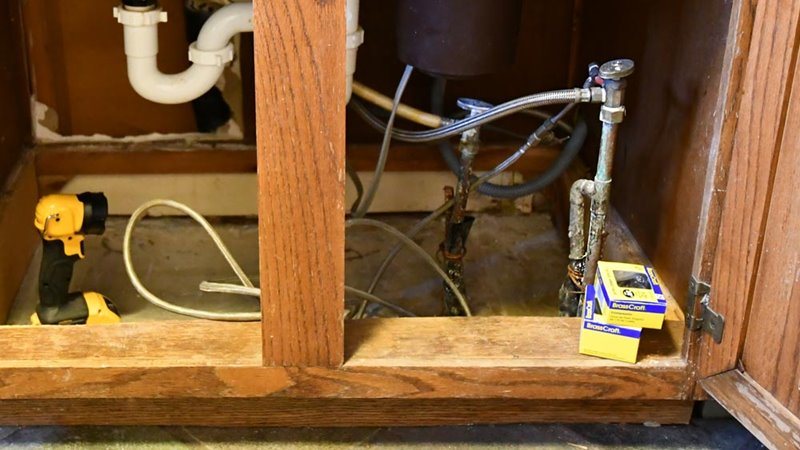
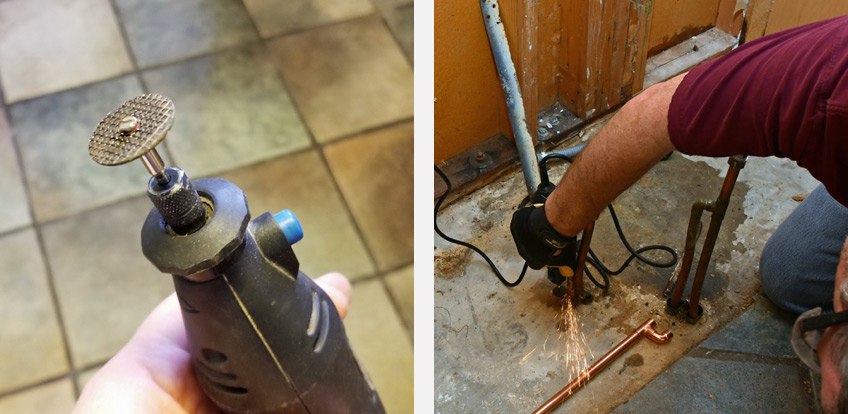
Both the hot and cold lines were attached to a length of rebar as they poked up from underground. It was had to go.
The rebar was too close to the soft copper tubing for me to try to cut it with my reciprocating saw so I loaded a cut-off wheel in my rotary tool and carefully sliced through the heavy steel. It took a while, but wasn't difficult at all.
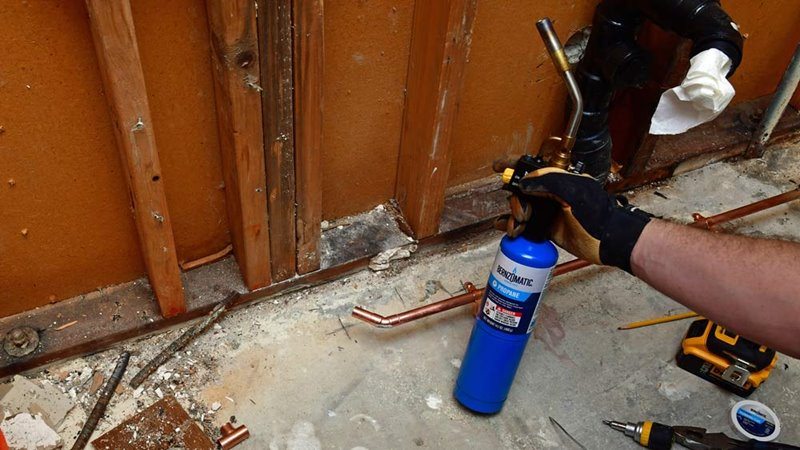
The Cold Water Line - the Easy One!
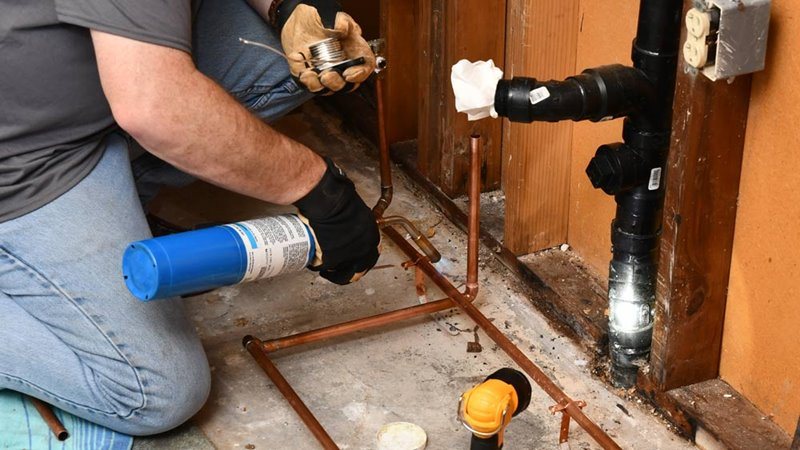
I shut the water off to the house at the front valve and went to work. First, I cut the single, cold line off a couple inches above the ground with a tubing cutter. Some water came out. It's ok; I can swim.
A clean solder-joint, is a happy soldered joint. I take the time to do it right by thoroughly cleaning both mating surfaces of the tubing and the fitting. Whenever I've had a failed attempt in the past, it's been when I forgot to hit one side. You can use emery cloth, but I usually use a wire-brush made for the task.
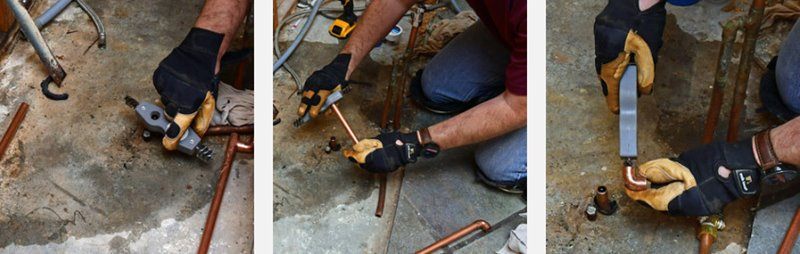
I put a thin coat of Bernzomatic Plumbing flux on both surfaces as well. I don't have a clue about the science behind this step, but it's key. Take your time and get it on there uniformly.
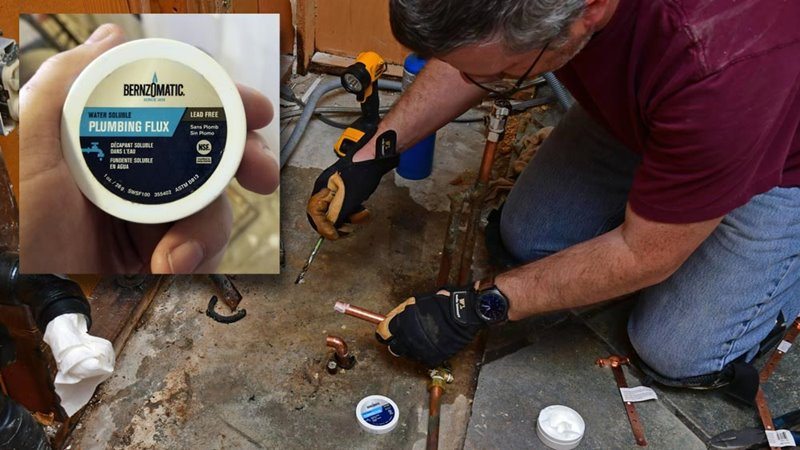
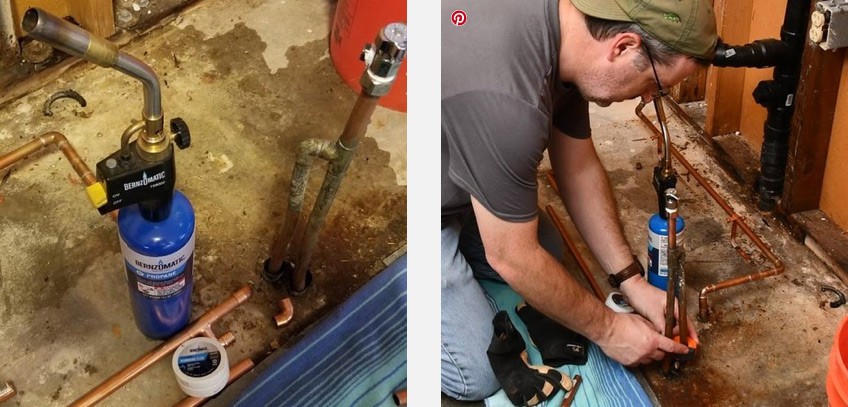
Next, I pulled the trigger on the Bernzomatic TS-8000 Max Heat Torch and pointed the flame at the copper elbow (not the tubing). After about 10 seconds, the paste flux started to sizzle like butter in a cast-iron pan. I touched an extended piece of plumbing solder to the point where the two pieces of copper meet as I heated the fitting, without letting the flame hit the solder. The solder melted and gots slurped into the joint. When both welds were done, I gave it a quick wipe with a damp rag, and moved on to the next.
Working along a multi-fitting run like this is two-handed work. I really like the trigger-start, instant on / instant off feature of the Bernzomatic TS-8000. I remember my Dad's blowtorch needed a flint-and-steel, sparker-thing and the manual twisting of a valve to turn the propane on and off.
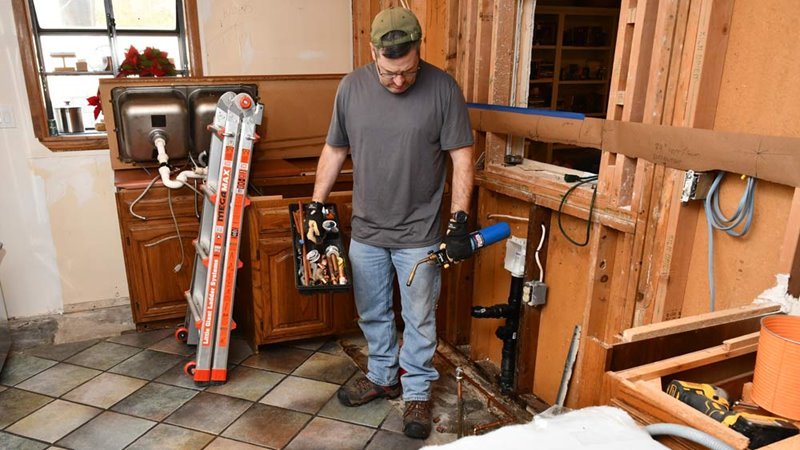
I finished the cold water line and called it quits. I don't like to do plumbing stuff late in the day, just in case I screw something up and can't get to the hardware store. I came back in the morning with my party-tray of plumbing stuff to attack...
The Hot Water Line - The Challenge!
It was challenging because there were two lines coming up through the slab, really close together. They were bent and at different angles.
I came up with a plan using a "Street 90" fitting I found at the hardware store. It was different from a regular 90 degree elbow in that it had one male-end, and one female end, rather than two female. I could attach it directly to another fitting without a little section of straight tubing.
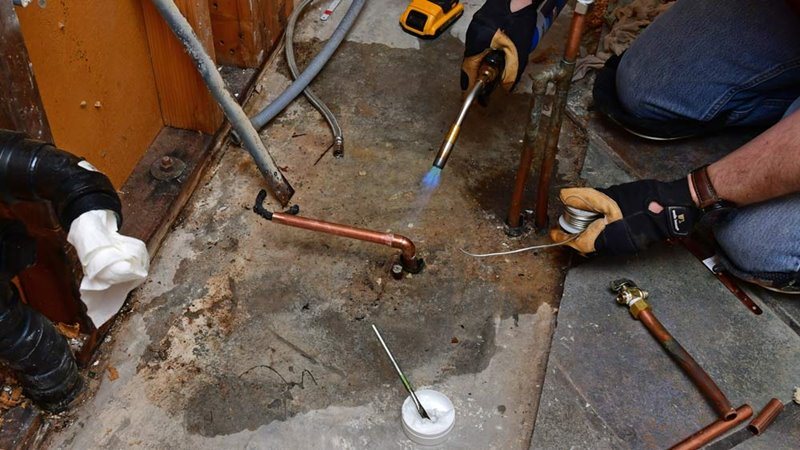
Another issue I struggled with, was that water kept ebbing up through the pipes from below. It seemed never ending. I'd never be able to solder water-filled pipes.
The Bread Trick
A buddy at work shared a cool (silly?) trick that actually worked. I wadded-up and stuffed some white bread (a French baguette to be precise) into the pipes to plug the water. It would hold the water back enough to solder the connections, but dissolve enough to flow out when the water gets turned on.
The bread trick worked perfectly! I was able to take my rime make all the solder connections easily.
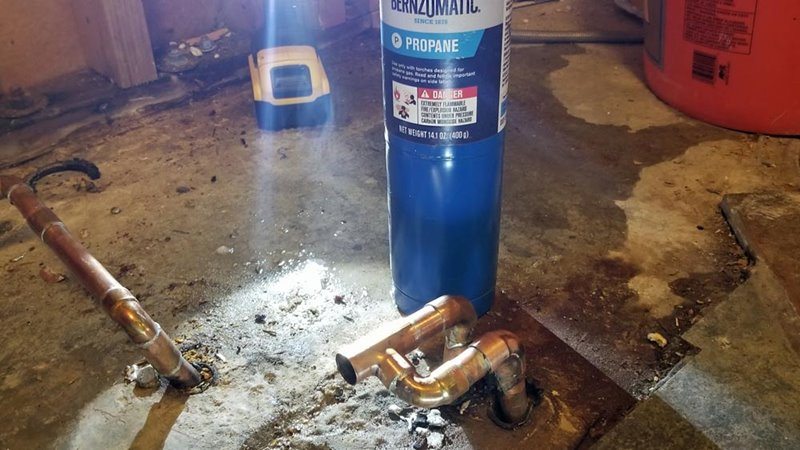
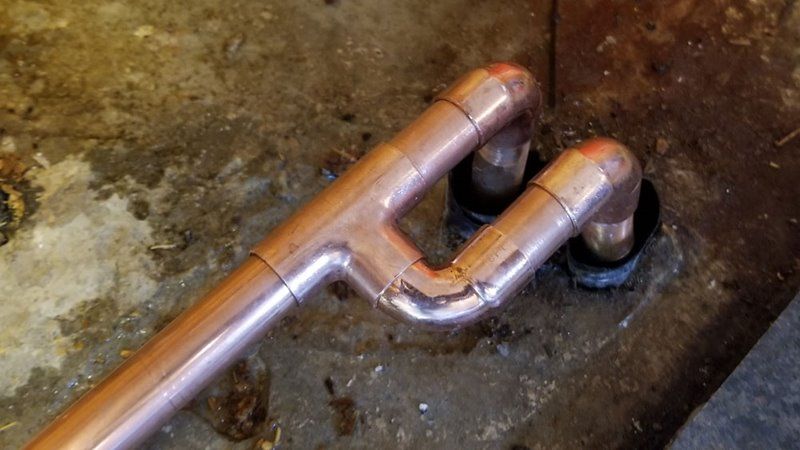
It wasn't the prettiest looking job, but it worked. I was able to twist and maneuver the 4 fittings on the angled stubs from the floor to get the hot water line pointed the right direction.
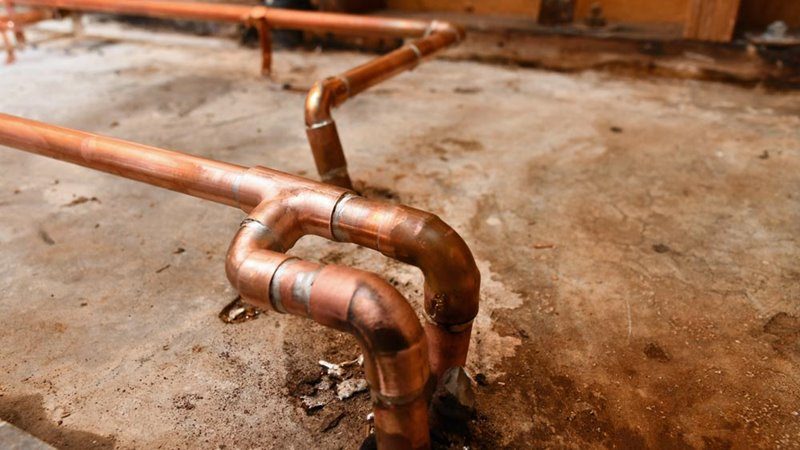
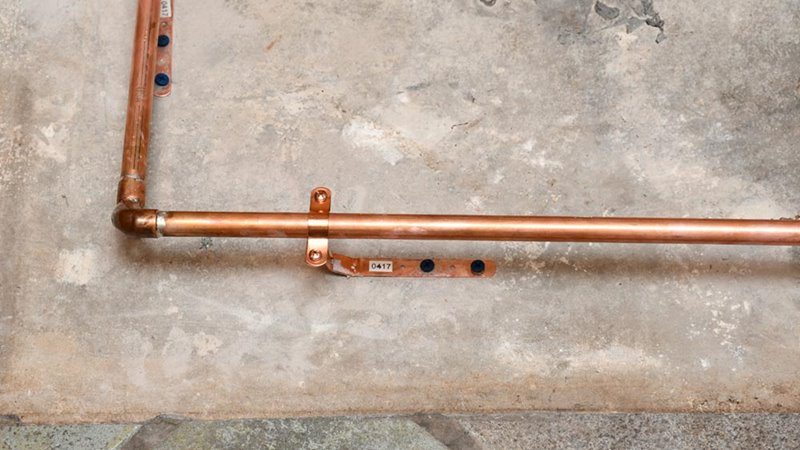
With the hard part done, I worked my way along the rest of the run. I don't know if I actually had to run my lines square and straight or if I could have taken the shortest, direct path, but I like to keep things neat, even if no one will see it. Maybe the kitchen will get another remodel 40 years from now. I don't want the next person to think of me like I think of my predecessors.
I had to cross the lines to get the hot and cold positioned where I wanted them. I made sure there was plenty of room between them so nothing could rub.
To keep everything in place and secure, I had to install some supports. I chucked a masonry bit into my cordless, and set it to hammer drill mode. I zipped some 1/4" holes down into the slab.
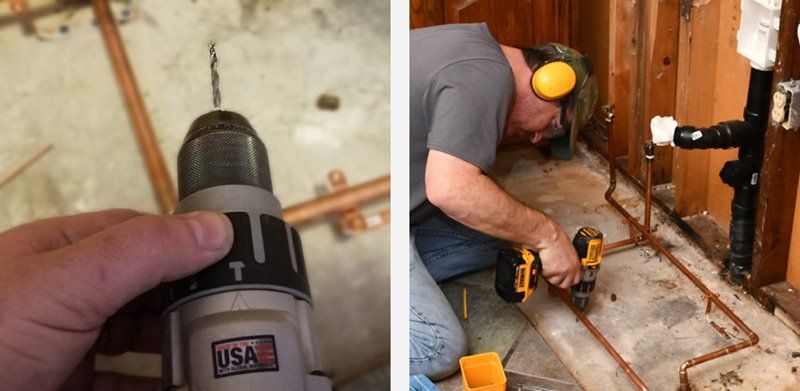
I used some coated masonry screws to attach supports to the floor. Copper doesn't like dissimilar metal touching it. I think the coating on the screws should make a good barrier. I'm going to look into it, but maybe I need to put some sort of plastic washer between the copper strap and the floor, just to be safe, before I close it up.
I'm really pleased at how this turned out. In the end, it was super easy to do and saved a bunch of money to do myself. The water lines are in the right location for the new sink, plus they are in the back of the cabinet so we can store stuff in there easily.