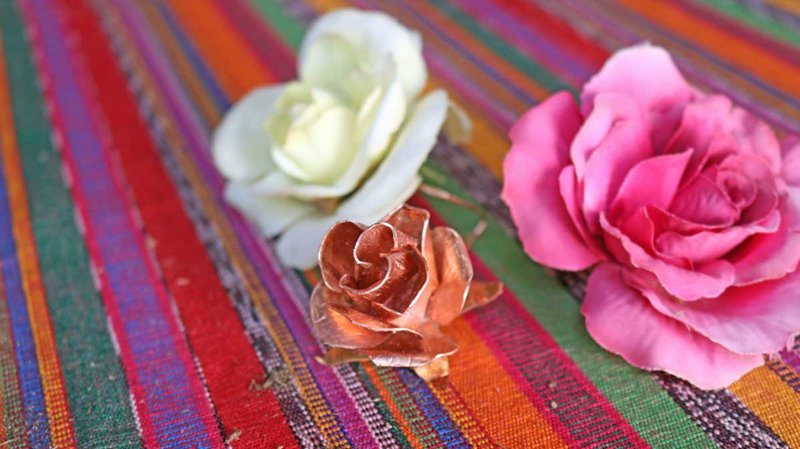
I’ve always wanted to make copper roses and after watching a variety of methods on YouTube, I went for it! This was a perfect opportunity for this month’s Bernzomatic Torchbearer project!
Alrighty, I’ll be honest, there is a bit of a learning curve on this one. And it takes a lot of patience and stamina – but it’s totally worth it. And once you make one copper rose, you’ll want to make a dozen. I used a micro torch and solder to fuse the copper pedals together – you’re also going to need a strong set of pliers!
This is the torch I used!
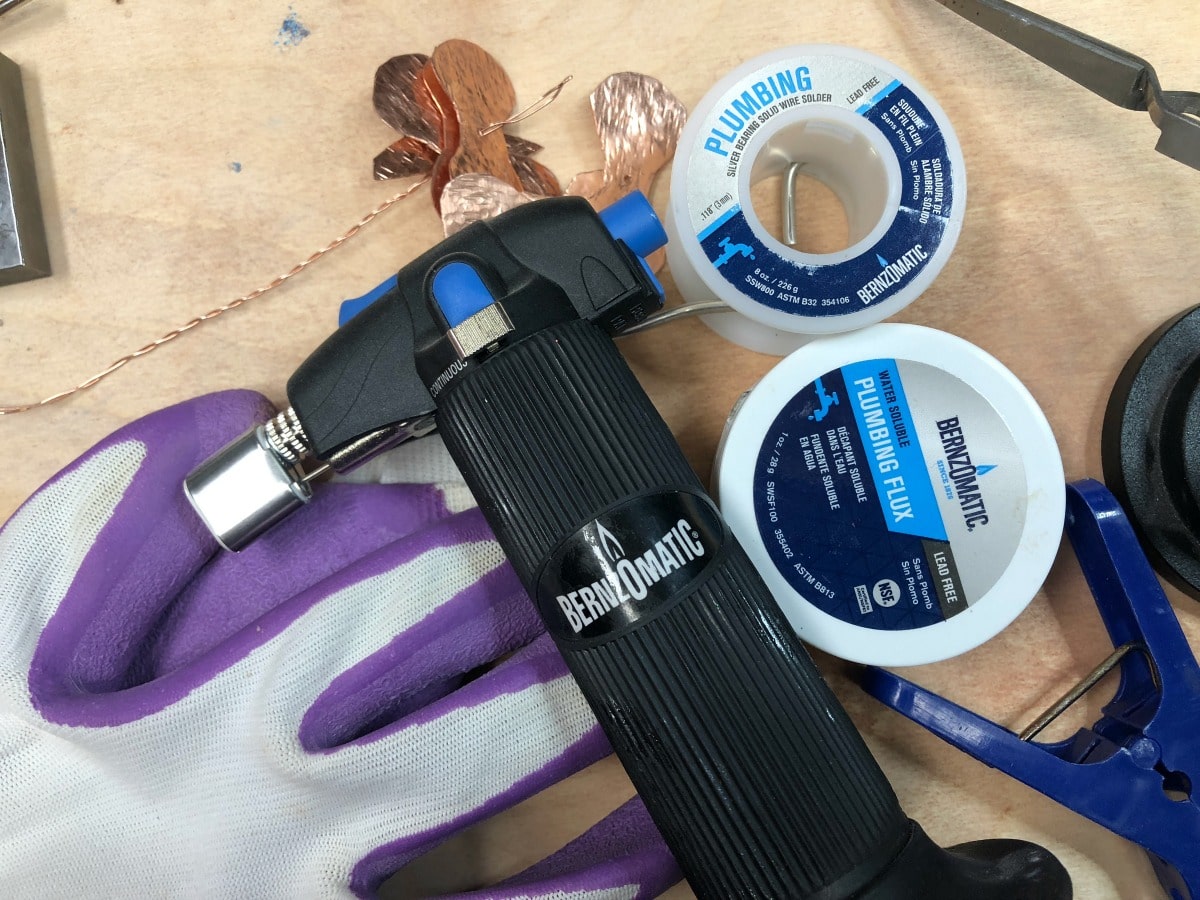
Designed for precision work including fine soldering, jewelry repairs, craft projects and heat shrinking wire, the Detail Torch for Hobby and Household Use features three interchangeable settings: fine soldering, hot air blower and pinpoint flame. An electric ignition makes lighting quick and easy, an adjustable flame control knob allows for a fine-tuned precision flame, and continuous flame lock keeps the torch lit while in use.
This is always my go-to because it has so many features. I can use it as a soldering iron, a micro torch or even a mini-heat gun.
Let’s get rolling on this copper rose, shall we?
Directions
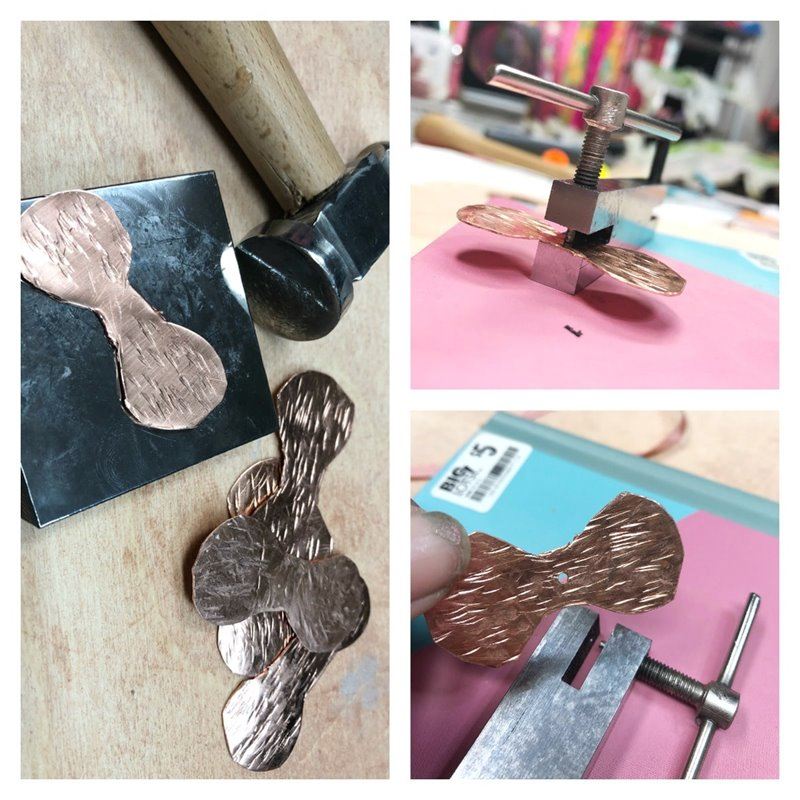
Draw out a pattern to the size you want. I kept mine small since this was my first time. Now that I know the process, I’ll definitely make a larger rose next time! Use your snips to cut out about five or six pieces. Peel away the protective skin from the front side of the copper sheet.
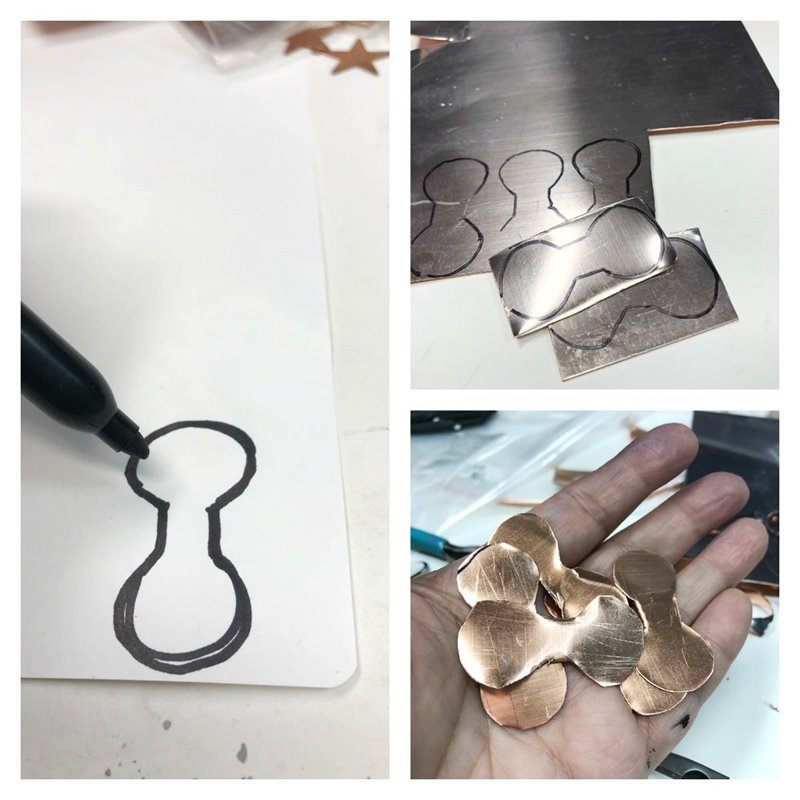 This portion takes a bit of muscle and stamina! Use your chasing hammer to flatten each piece. This will make the copper soft and pliable and will give your pedals texture. Punch a hole through each one.
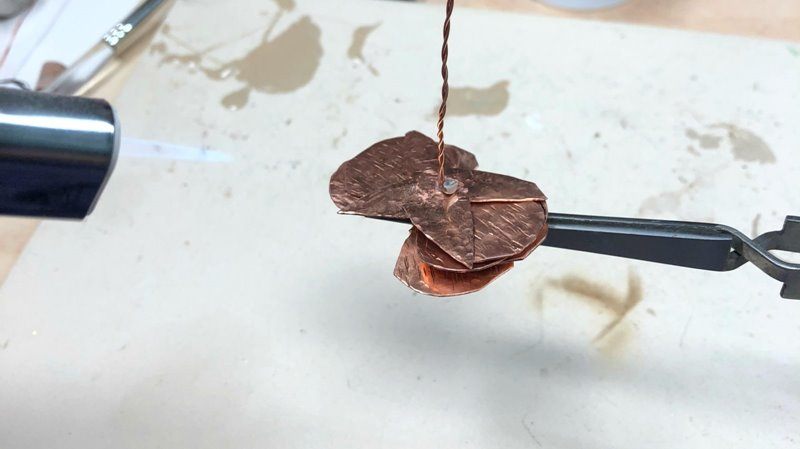
 Time to put them all together. Gather up the rest of the supplies. I twisted copper wire to feed through the holes to connect the pedals. You want to stack them alternatively, and if you want you can make the leaves that are under a rose.
Set the rose upside down in the third-hand tool, and apply flux and solder. Time to light up your torch! Follow the manufacturer’s direction. I used a medium flame for this.

Slowly circle the flame around the piece to warm up the medal, rather than aiming it directly at the area. Go around in small circles and the solder will melt and fill in and connect the stem to the pedals. Drop in a cup of water to quench.
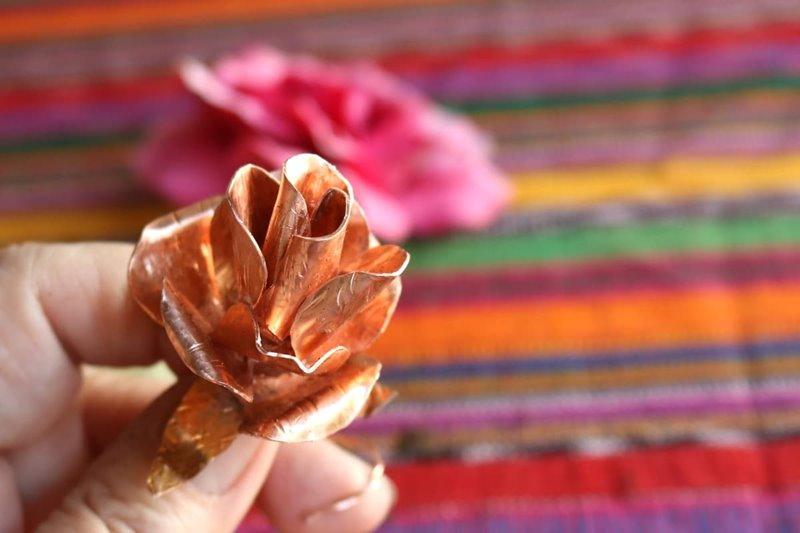
For the top, I twisted a portion of the wire to secure the pieces. Polish as necessary, then use needle nose pliers to bend, shape and curl your rose to your liking!
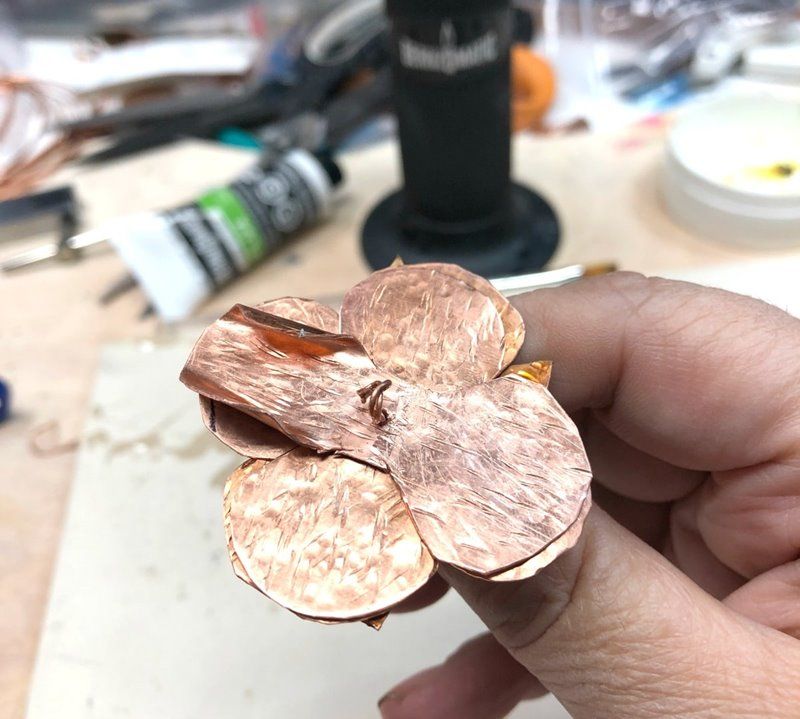
And there you have it! These are so cool and fun to make once you get the hang of it. I’m excited to play with idea more and try bigger roses!