Project Credit: Bernzomatic Torchbearers Mark & Theresa Clement
Replacing a hose bib should be—should be—easy. Often it is. Hurl in the old house wild card, however, and there can be more than just soldering copper pipe and patting yourself on the back. Fortunately for this failed hose bib, we’re part of Bernzomatic’s Torchbearer program and we can share this project with you as part of it. Soldering copper pipe and fittings is both essential and just the beginning on this fix.
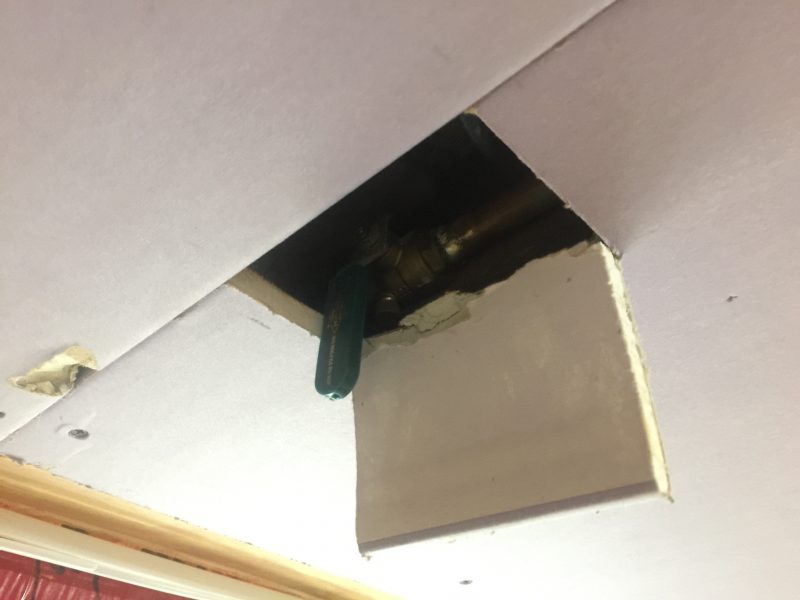
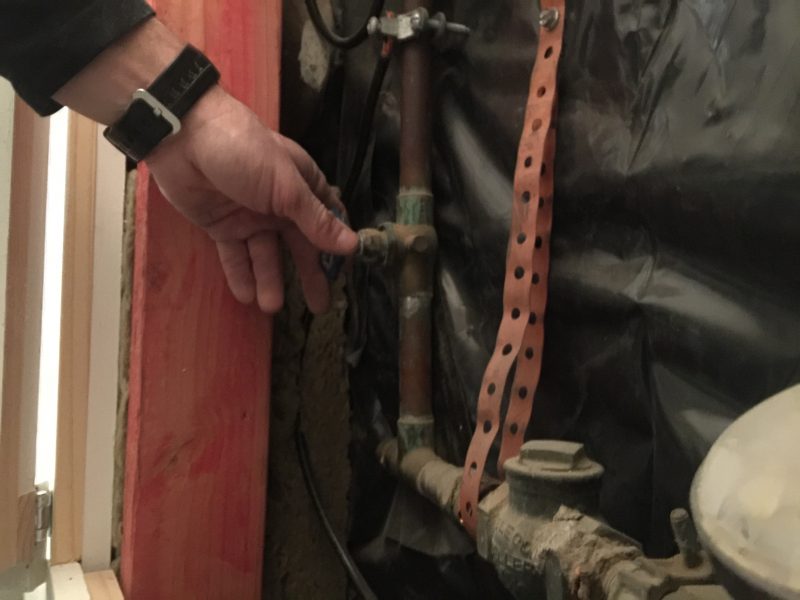
The obstructions and thoughtless old work pile up fast in old house fixes. Between the jungle of electric, coaxial cable (co-ax), internet boxes, and plumbing (and this is only half of it) the original shut-off doesn’t function with a newly drywalled ceiling.
Because this hose bib repair is tied into an ongoing remodel it’s not just plug-and-play. To work around everything, I have to tap into a bunch of different skills and tools. And most importantly: Think through the ramifications of what’ll happen when this is a finished space.
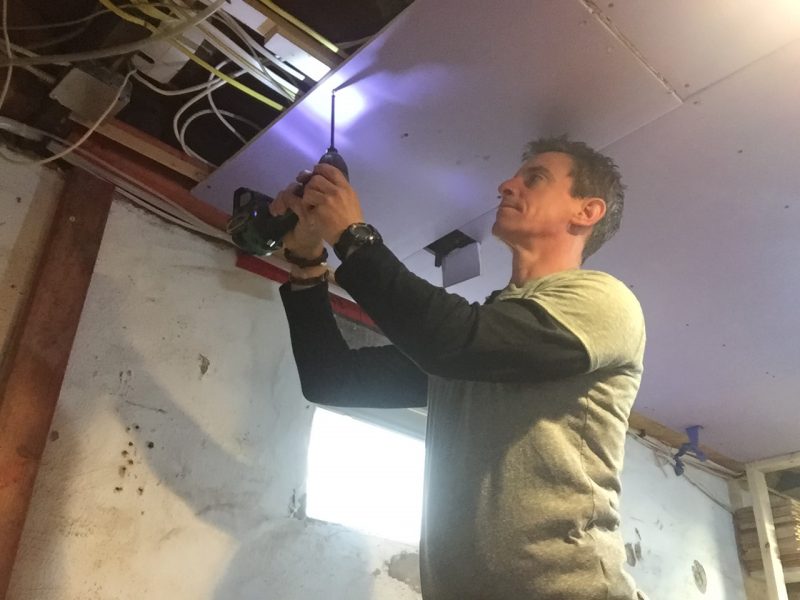
After opening up the ceiling and considering I’d need an access hatch in the finished room, I decided it’d be better re-route everything. So, I drilled out the joists—1-inch holes no closer than 2-inches from the bottom of the joist. The stud on the wall is the beginning of the utility closet where I can have unfettered access to the shut-off while hiding it and not having to build an access hatch.
Drilling new holes for the re-routed copper supply line.
If you’re lucky, you’ll have an in-line shut-off somewhere downstream from the main water supply to the house. If not, you have to shut all the water off for as long as the job takes you to complete. That means toilets can only be flushed once. And you’d better make the coffee ahead of time! In other words, it effects other people.
Shut the house water off.
After shutting off the water, open a faucet or two upstairs. This is like taking your thumb off the top of the drinking straw; it lets water drain. And where will it drain? Wherever you cut the pipe, which we do next. Be prepared to let it drain on the floor or to catch it in a bucket.
Take your thumb off the top of the straw.
I cut the pipe just a few inches upstream of the existing shut-off. I’m glad I never threw away the hacksaw I have not used since Lincoln was President. It was the best tool for this cut.
Cut the existing pipe at the tie-in point.
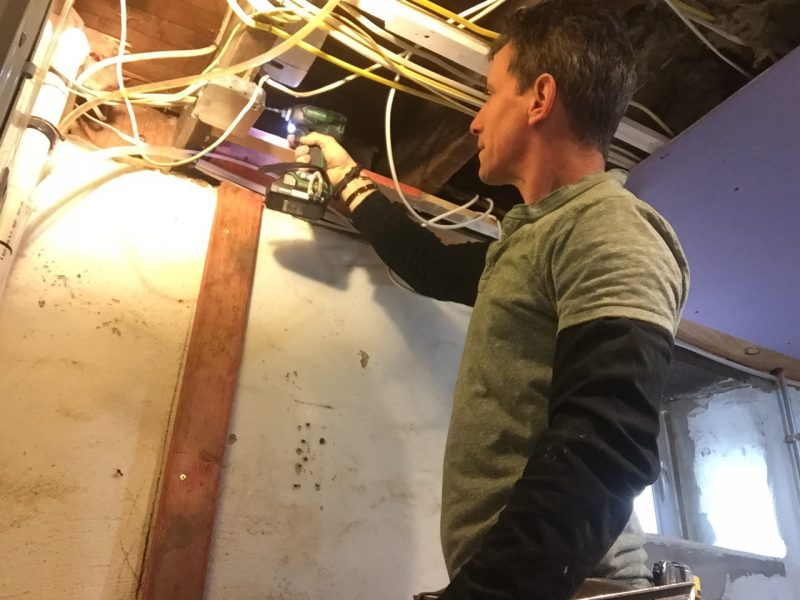
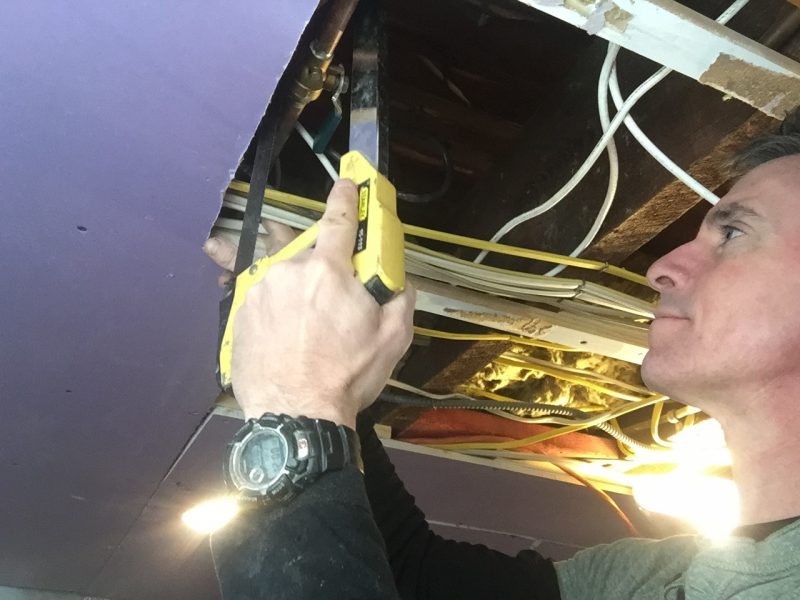
So, that’s a rats nest of stuff to work around: The breaker panel, condensate lines, sump ejection pipe, and about 10,000 wires stapled willy nilly above my head. And a ton of dust and insulation. I also needed a rotary hammer and long-as#-needed drill bit to go through my old house foundation.
Quick Note: I’m not trying to dissuade you from this. Nor am I trying to ‘inspire’ (ack!) you to take on something over your head. I hate that crap. No, I’m trying to share with you…you know…what happens in real life. I think you’ll be more likely to take on another torch project if doing this one isn’t a train wreck. Just sayin’, they don’t call me Captain Practical for nothing.
Tool-wise, beyond the typical stuff, I needed a rotary hammer both inside the house (to drill through block foundation) and outside the house (to set the faucet to the stucco). I also needed at least three bits along with my impact driver, masonry screws, and no shortage of patience. It was an Amerian Ninja-like maze just to get the drill into this joist bay.
Drill the new hole through the house.
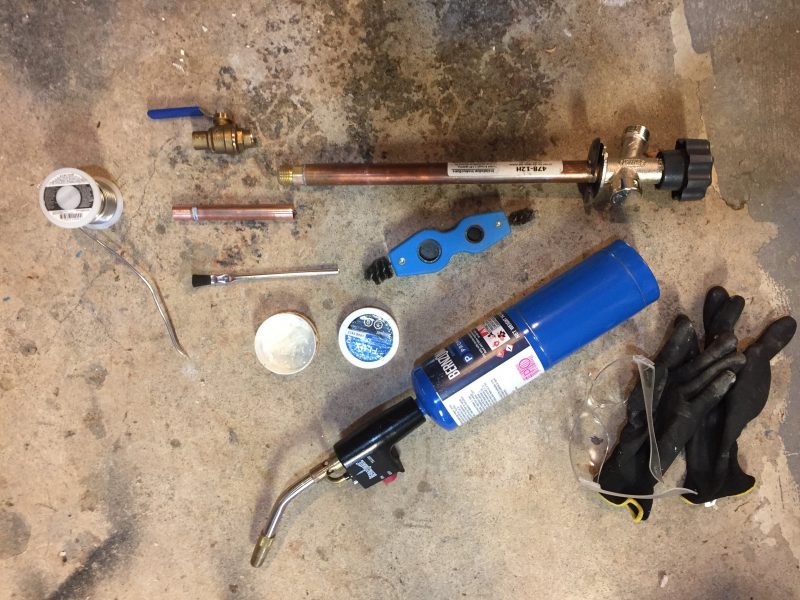
I used Bernzomatic propane and the TS4000 torch head.The TS4000 was ideal here. I got a lot of use out of the lock-on button so I could focus more on keeping the flame aimed where I wanted it instead of having to hold the trigger down. I also used both a wire brush and aluminum oxide sandpaper to clean any copper surfaces that would contact one another. I also love lever-handled shut-offs.
A few helpful soldering tips a plumber kindly shared with me:
- Heat the fitting, not the joint
- Apply the solder from the opposite side you heat the fitting. Together, this has the effect of drawing the solder around the joint and making a neat, watertight seal.
- Wipe the solder down with a rag after application.
Soldering stuff. Safety stuff not to be overlooked when soldering above your head.
It’s easier to solder here on the floor than it is up in the ceiling, so I pre-assembled some parts. I also abandoned the threaded connection that the hose bib comes with and soldered a pipe inside the connection. And, just to be extra careful, I dry-fit all the pieces in the ceiling before soldering.
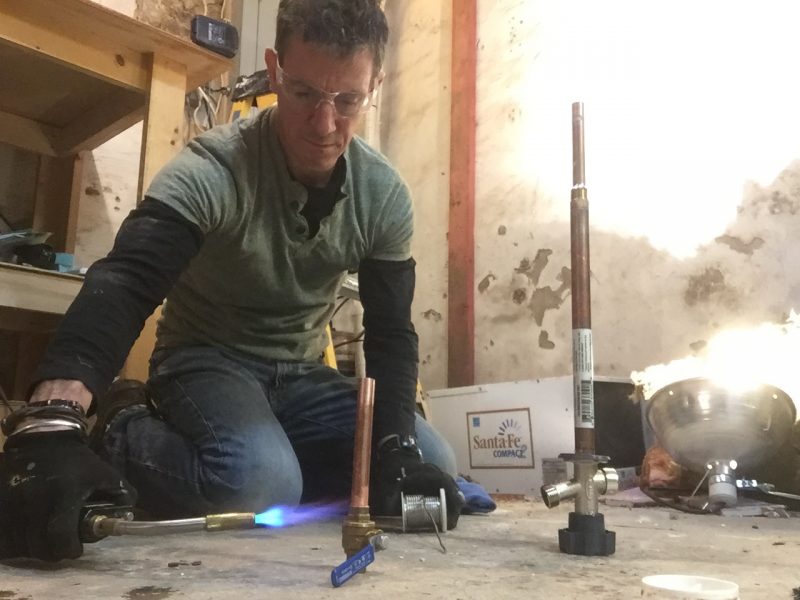
Pre-assembling some parts.
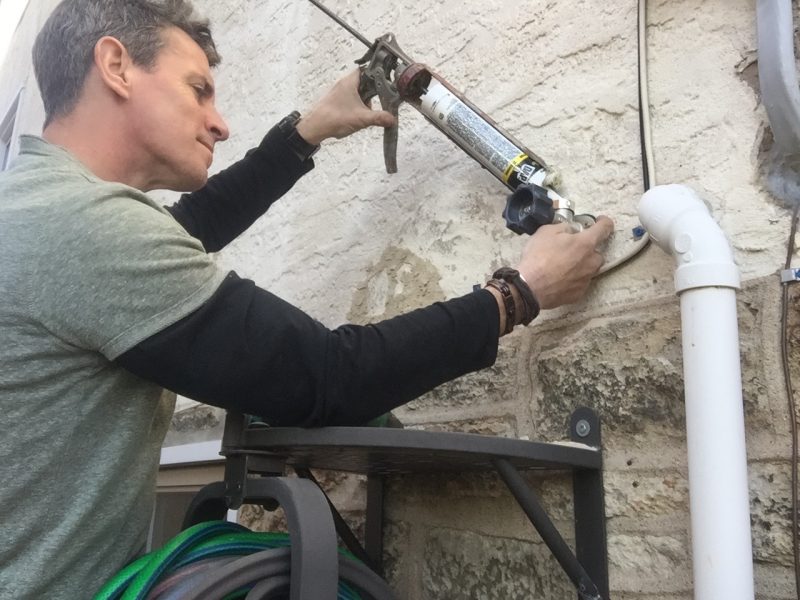
This job required a bit of running around—inside, outside, to the truck for tools, back inside, back outside…wait, what was I doing? Here, I’m setting some screws in the new hose bib. Just like building IKEA furniture, I didn’t tighten this all the way until everything was set inside.
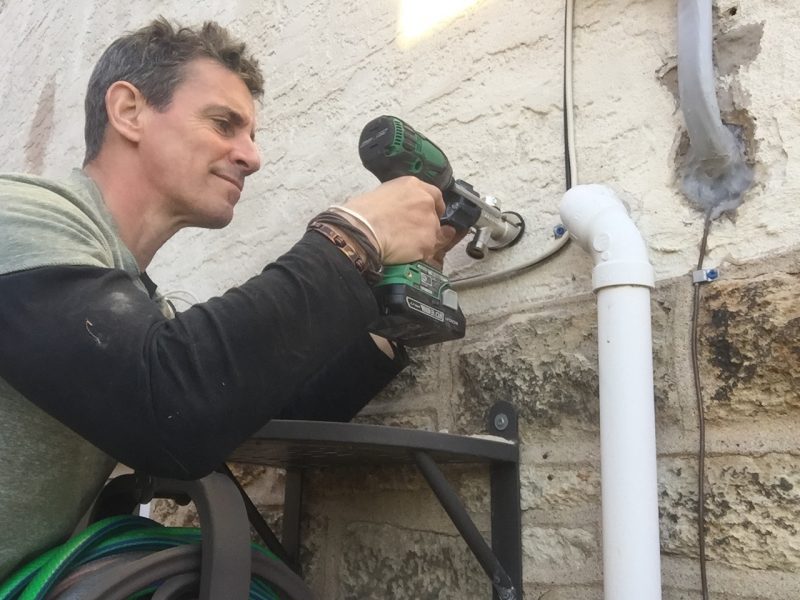
Secure—don’t set—the sillcock.
Using the solder-opposite-heat method, I got neat solders on my pre-assemblies—and no small shortage of comfort and joy! I could see a tight solder bead (joy) and knew it was water tight (comfort).
So why mess with a good thing? Up in the ceiling, I bent the solder so I could heat from below and apply solder from above with gravity working in my favor as well. A tuft of fire-proof insulation stands guard against burning a wire.
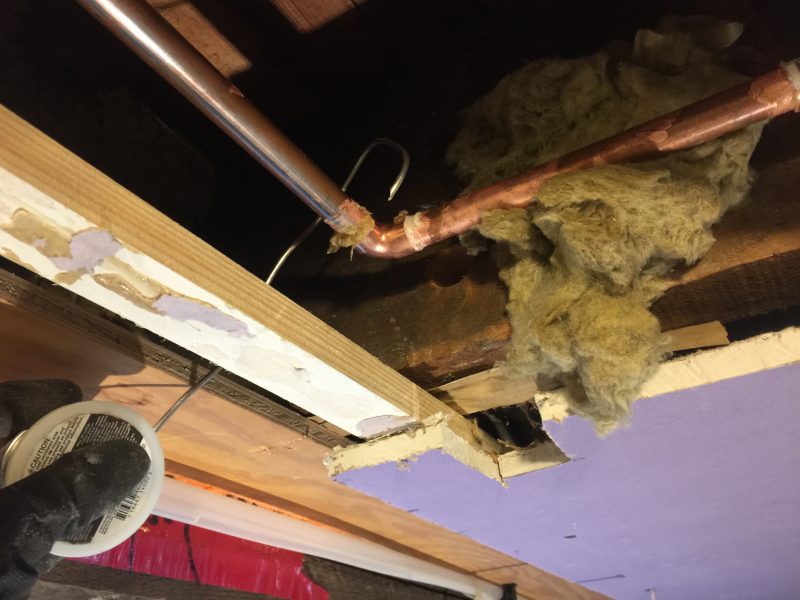
Hooked on soldering.
After the solders have cooled for a few minutes inside, set the screws holding the sillcock to the house. Last step—before cleaning up the million tools you just used—apply a bead of caulk to seal the hose bib to the house. Then turn your water back on and test everything out.
OK, now I think I’m done.